Disclaimer: This was not a particularly good use of my time.
With that out of the way, here’s a simple fix for anyone experiencing weird ticking noises from their late-model unibody MacBook Pros. Note that this is all a bit obsessive and off-kilter… but since no one else seems to have documented this fix I’ll make an exception and pollute the blog.
My otherwise-trusty 15” model has been giving off an obnoxious, metallic grating sound whenever the chassis flexes or whenever there’s a bit of pressure on the bottom of the case.
(For example, when using the machine on your lap instead of on a flat / hard surface.) The sound’s very strange — kind of a combination of bed springs and crickets. It’s a purely mechanical sound, and occurs even when the machine is off. Here’s what it sounds like — you may need to turn your speakers up, as it’s a bit faint:
On the MacBook Pro, the entire chassis acts as an electrical ground. The bottom case cover also needs to be grounded, and Apple’s design maintains contact between the upper and lower portions of a case with a number of spring-loaded contact points. As the chassis flexes during handling, these contact points move slightly against the bottom cover to create the grinding noise documented above. Thus getting rid of the noise is a matter of reducing friction between the contact points and the bottom cover.
This problem has been extensively documented and discussed elsewhere. (The most thorough discussion I could find is this thread on the Apple support forums.)
Some people have gone so far as to remove the grounding spring sub-assembly entirely. This is probably fine, but it seems foolhardy to start ripping grounding points out of your rather expensive and static-sensitive laptop.
Some others have reportedly used small pieces of tape between the spring contacts and the bottom case… this also seems naïve since the tape will act as an insulator and compromise the grounding point.
My solution is to apply a small dab of conductive grease to each contact point. This completely eliminates the grinding sounds without compromising electrical contact between the upper chassis and bottom cover.
Here’s the step-by-step:
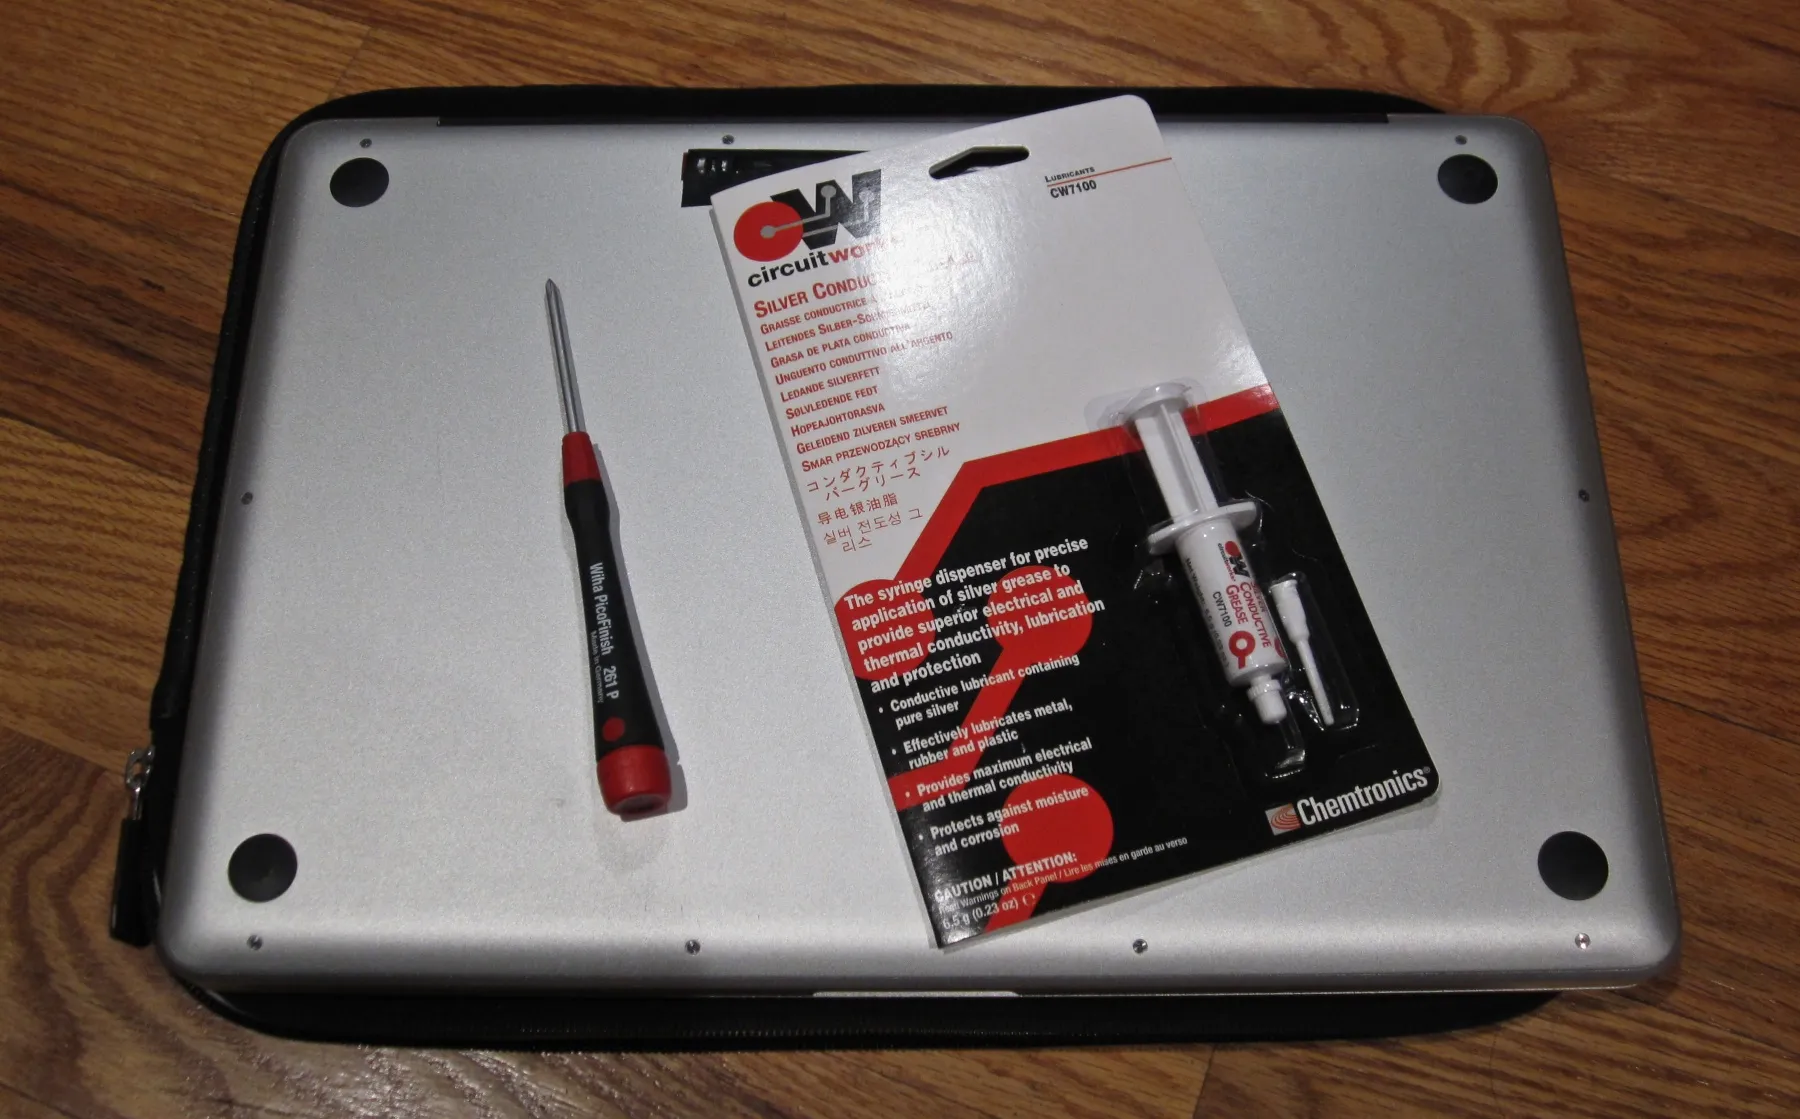
You will need your laptop, some isopropyl alcohol, Q-Tips, a #00 Phillips screwdriver, and conductive grease.
Note that you want electrically conductive silicone-based grease. Thermally conductive grease, like you would use between a CPU core and a heat sink, is generally designed to not be electrically conductive, and would be no better than using a layer of tape. I used a silver-impregnated silicone-based conductive grease from Chemtronics, part number CW7100. It’s tough to find and obscenely expensive. The best price I could find for a tube was $21 from All-Spec Industries. (And here’s a PDF of the data sheet, for those inclined.)
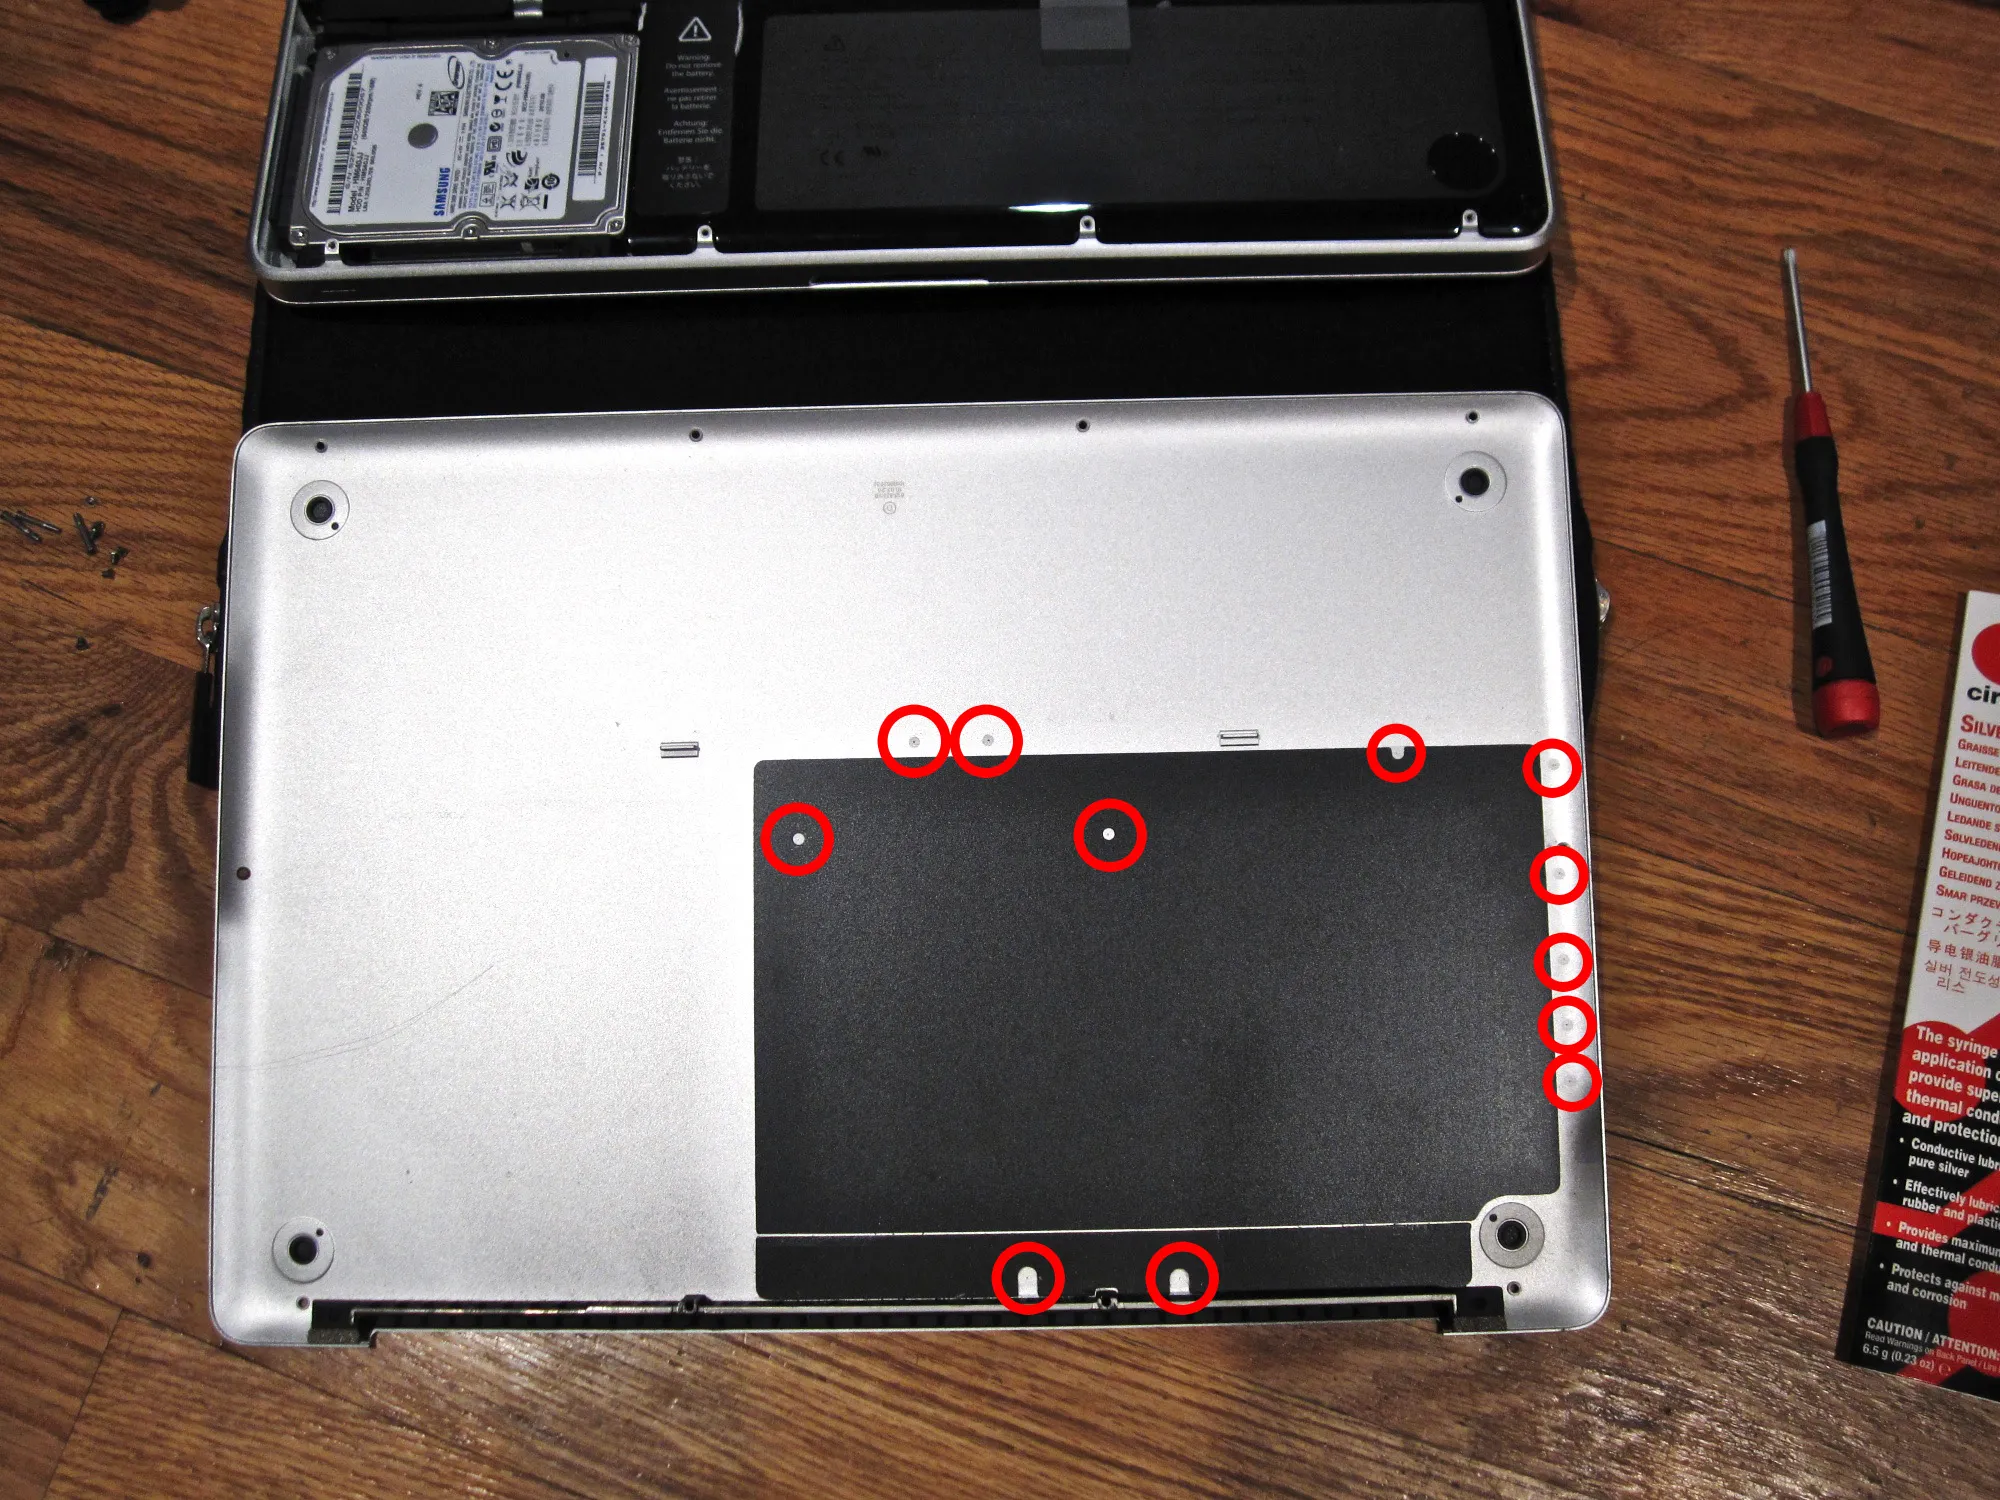
Remove the 10 screws securing the bottom cover to the chassis. Gently pry off the bottom cover.
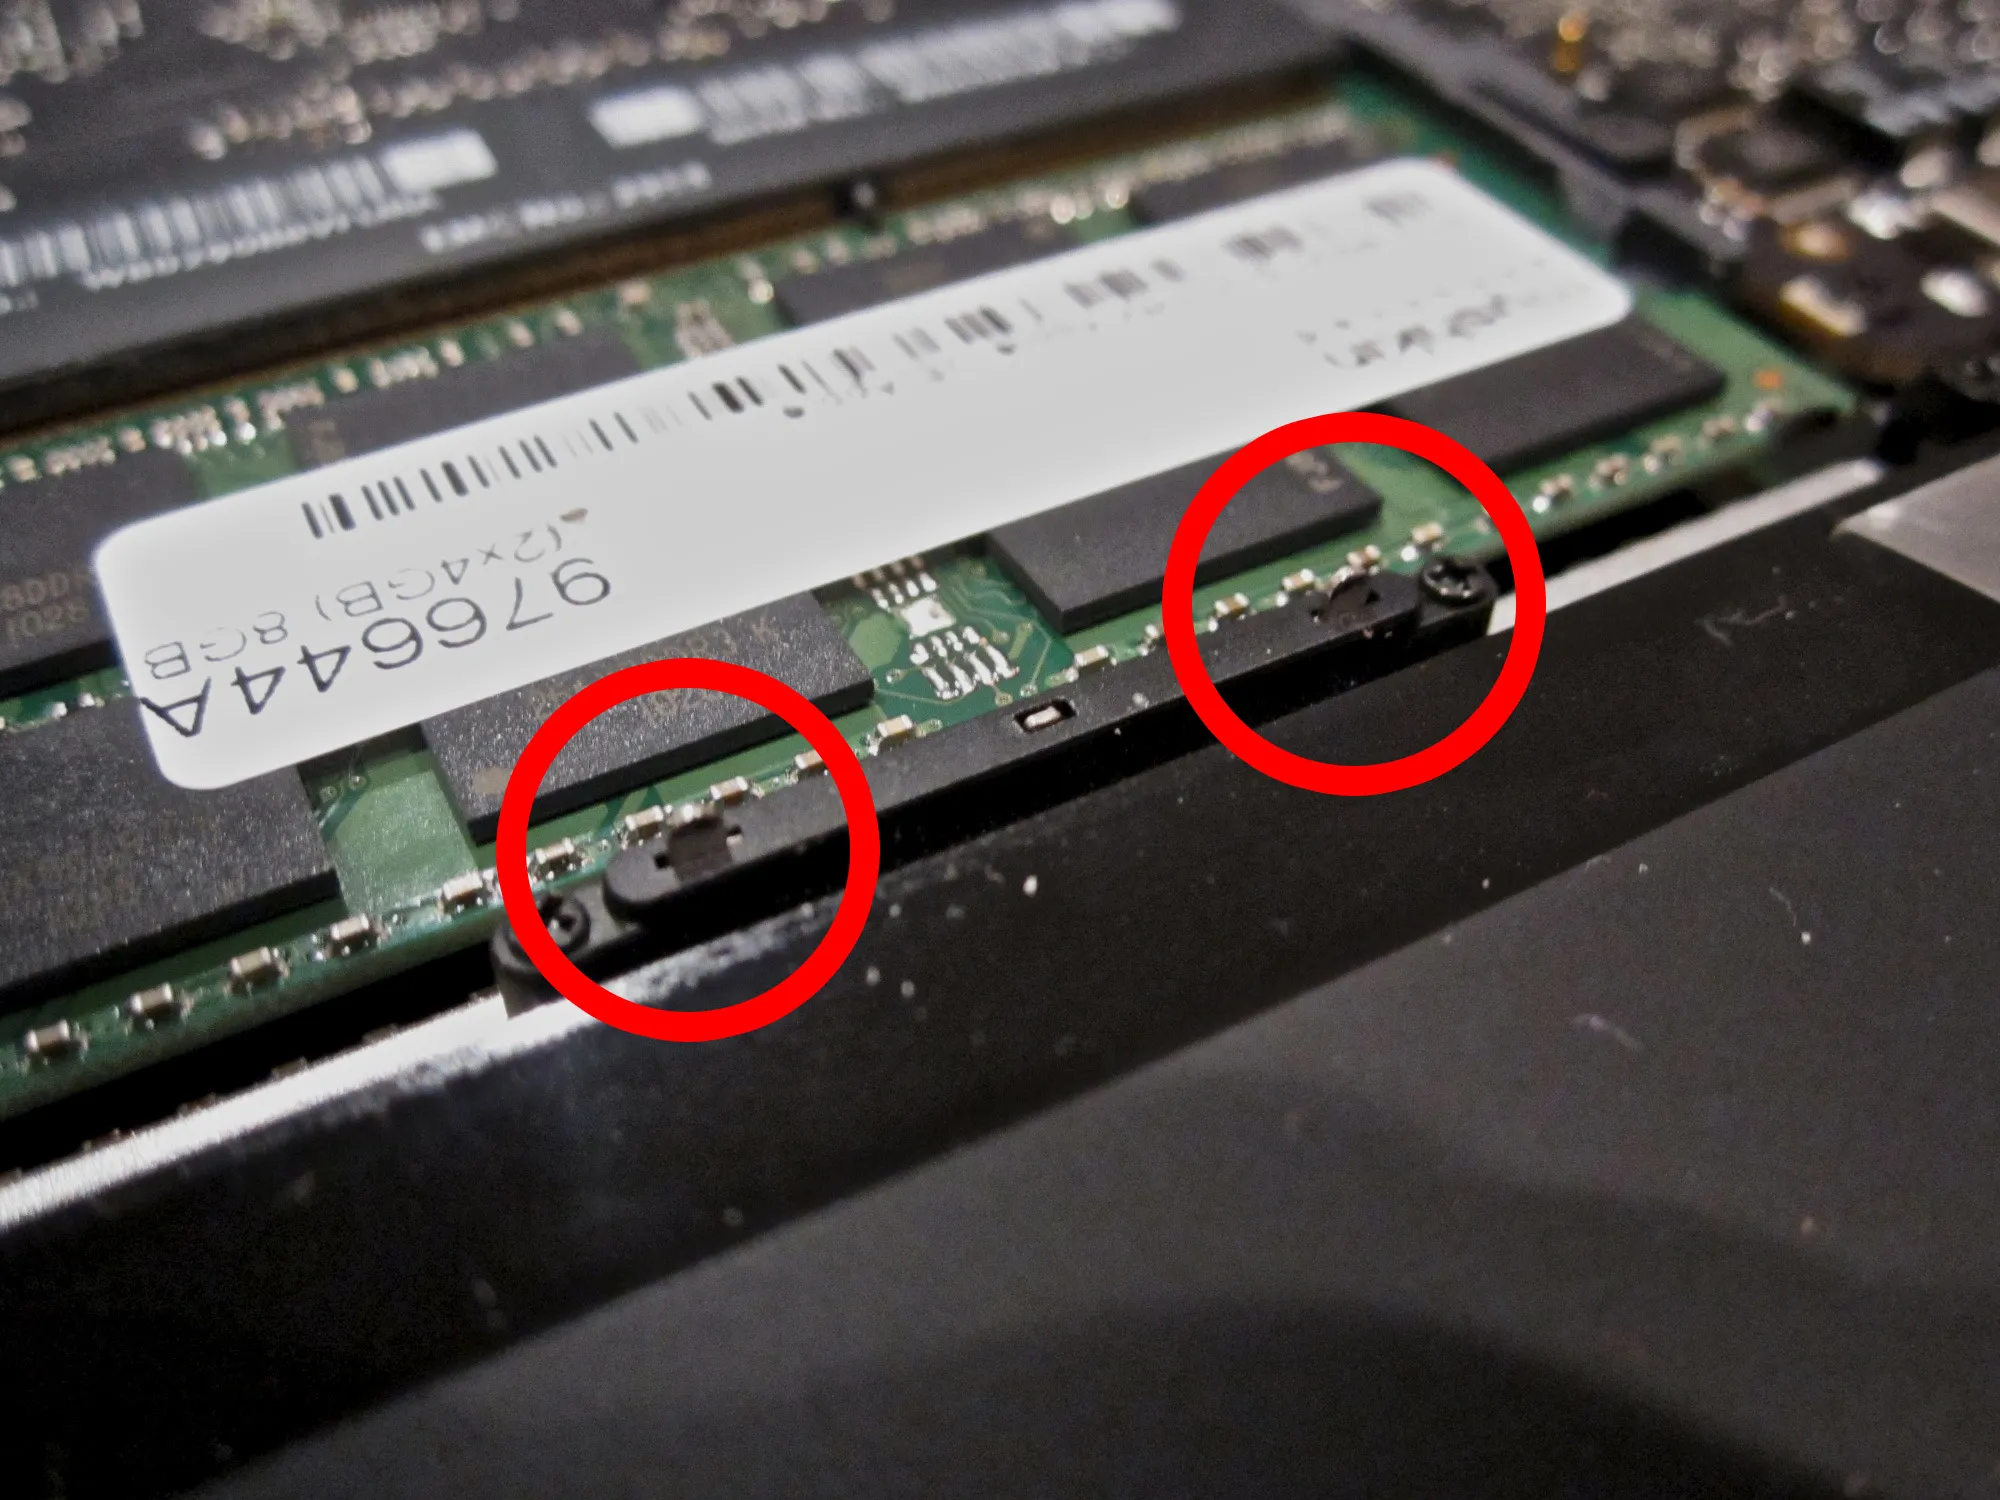
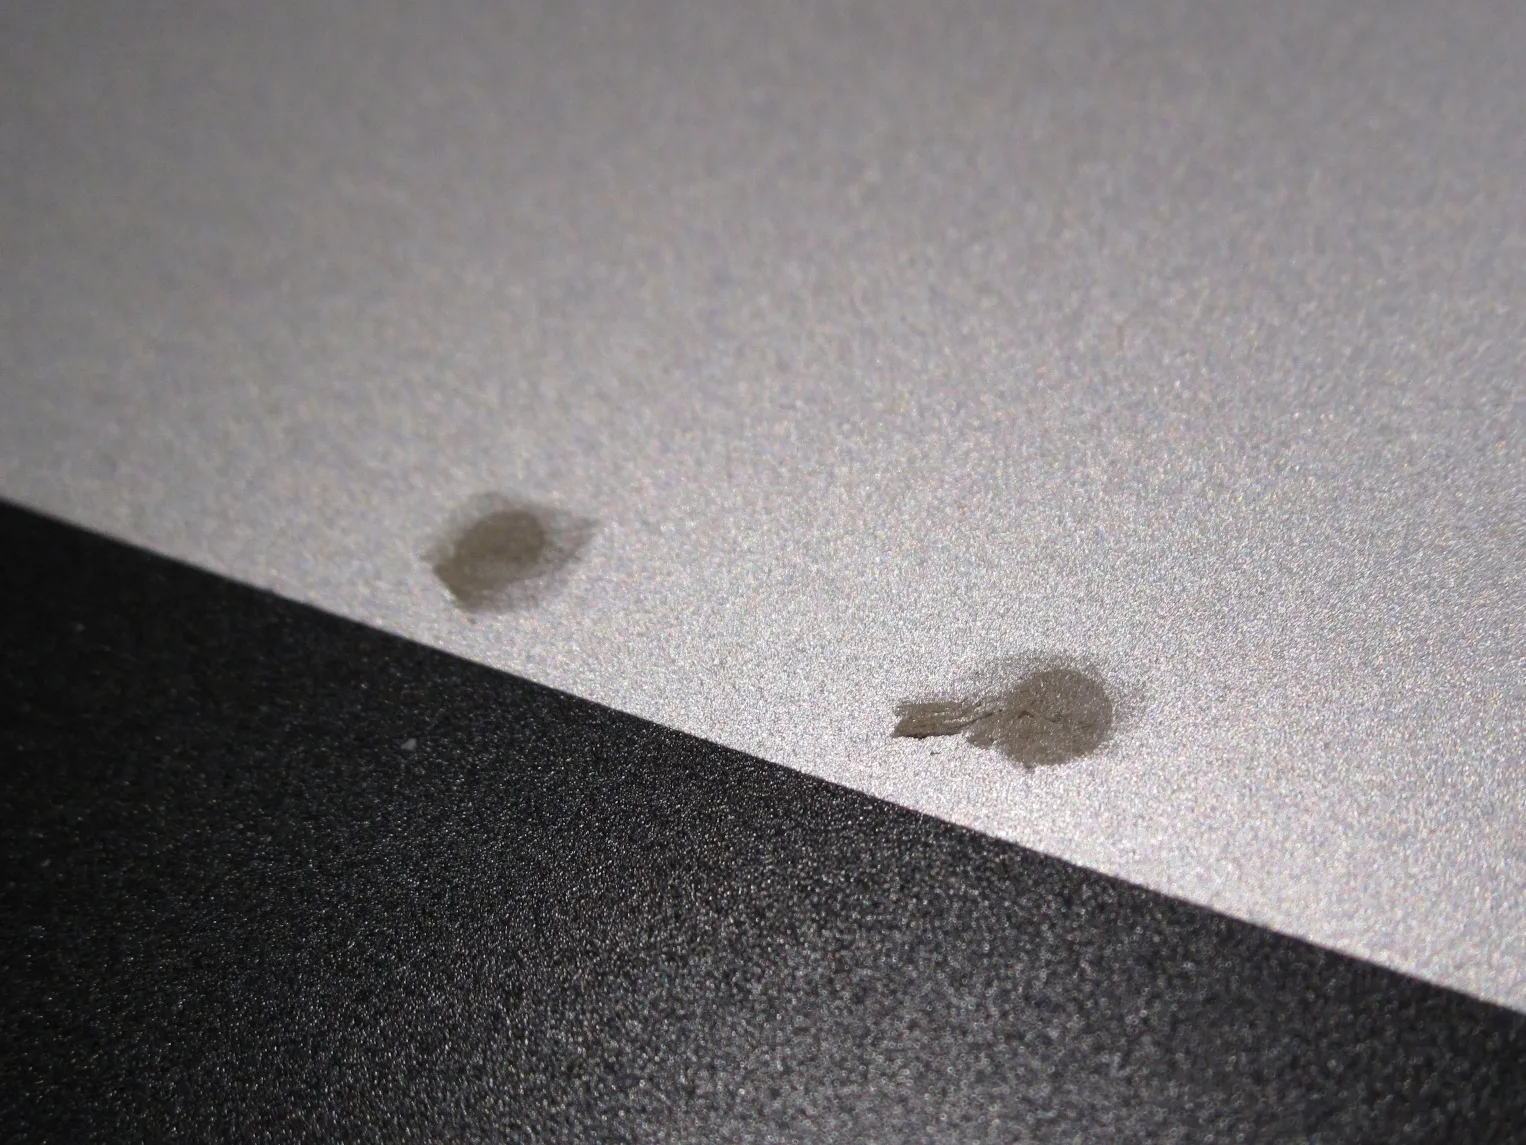
With the cover removed, you will see the offending pair of spring-loaded grounding contacts near the RAM in the center of the machine. (Enlarged at left.) On the bottom cover, you will see several other points of contact — about a dozen in all — identifiable by their slightly rough texture relative to the rest of the aluminum. (Right, circled in red.) Dip a Q-Tip in isopropyl alcohol and clean off each of these bottom-cover contact pads to make sure they’re free of oil and dirt before moving on to the next step.
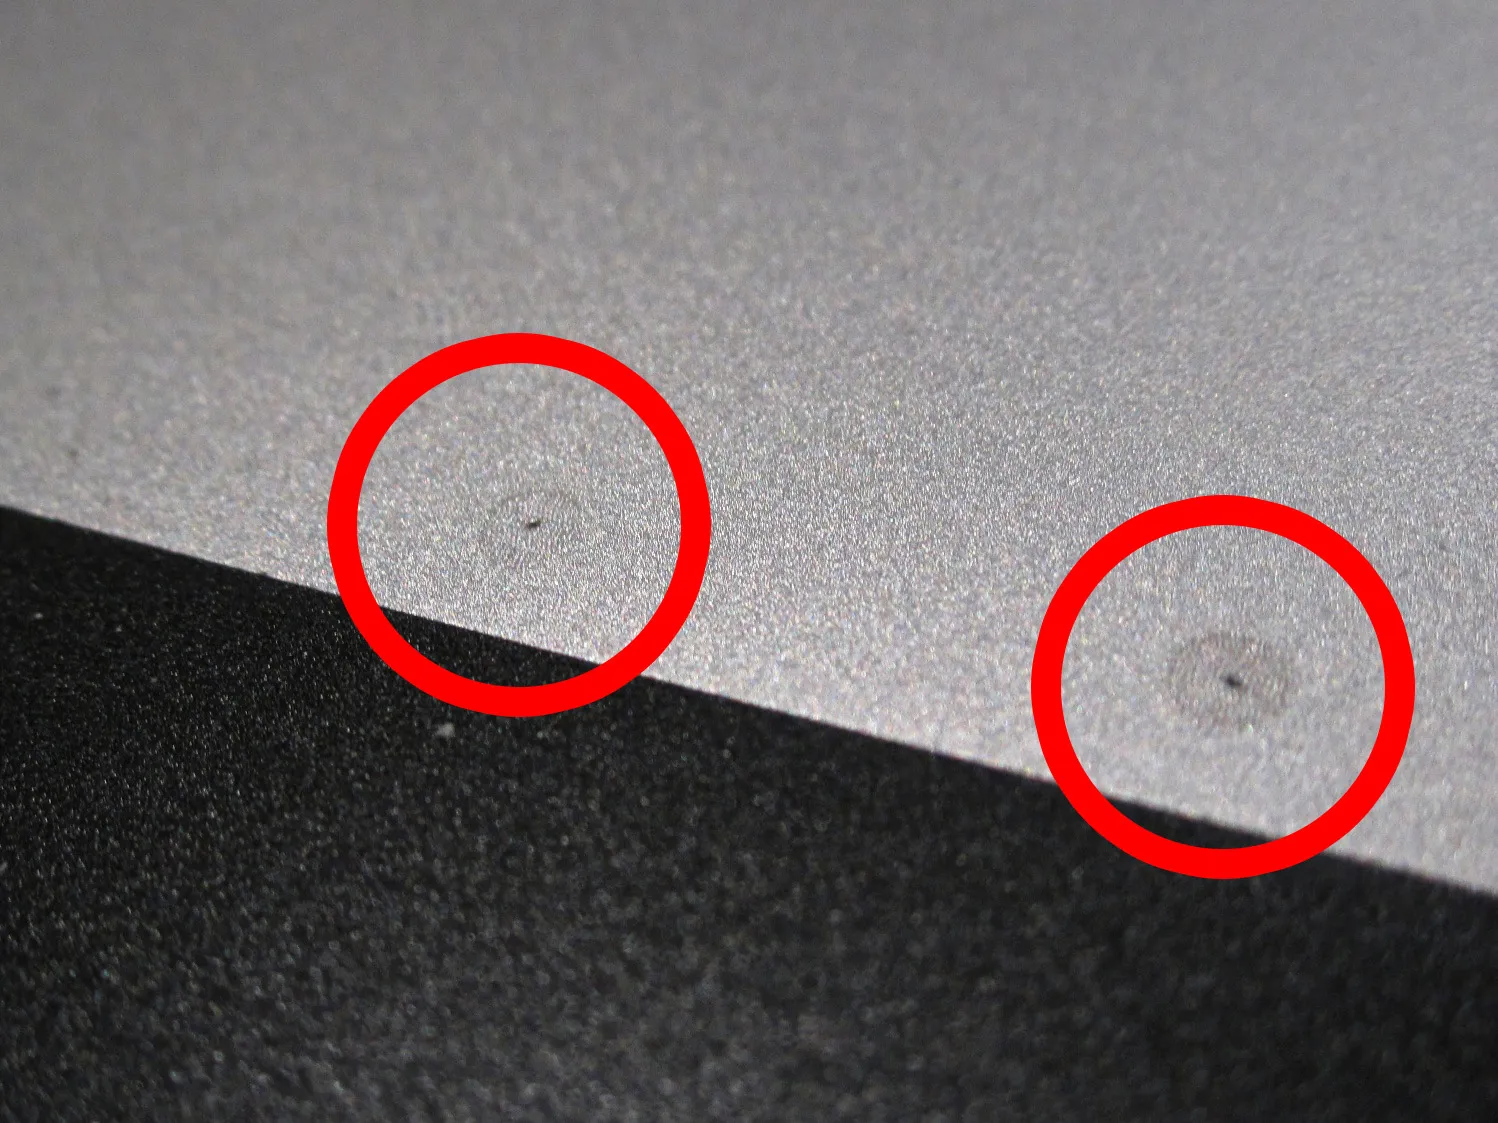
Add a tiny dab of grease to each of the 12 contact points. Try to keep it clean, and limit application to the confirmed points of contact. A detail of the center two contact points before grease application is at left, and the after is at right.
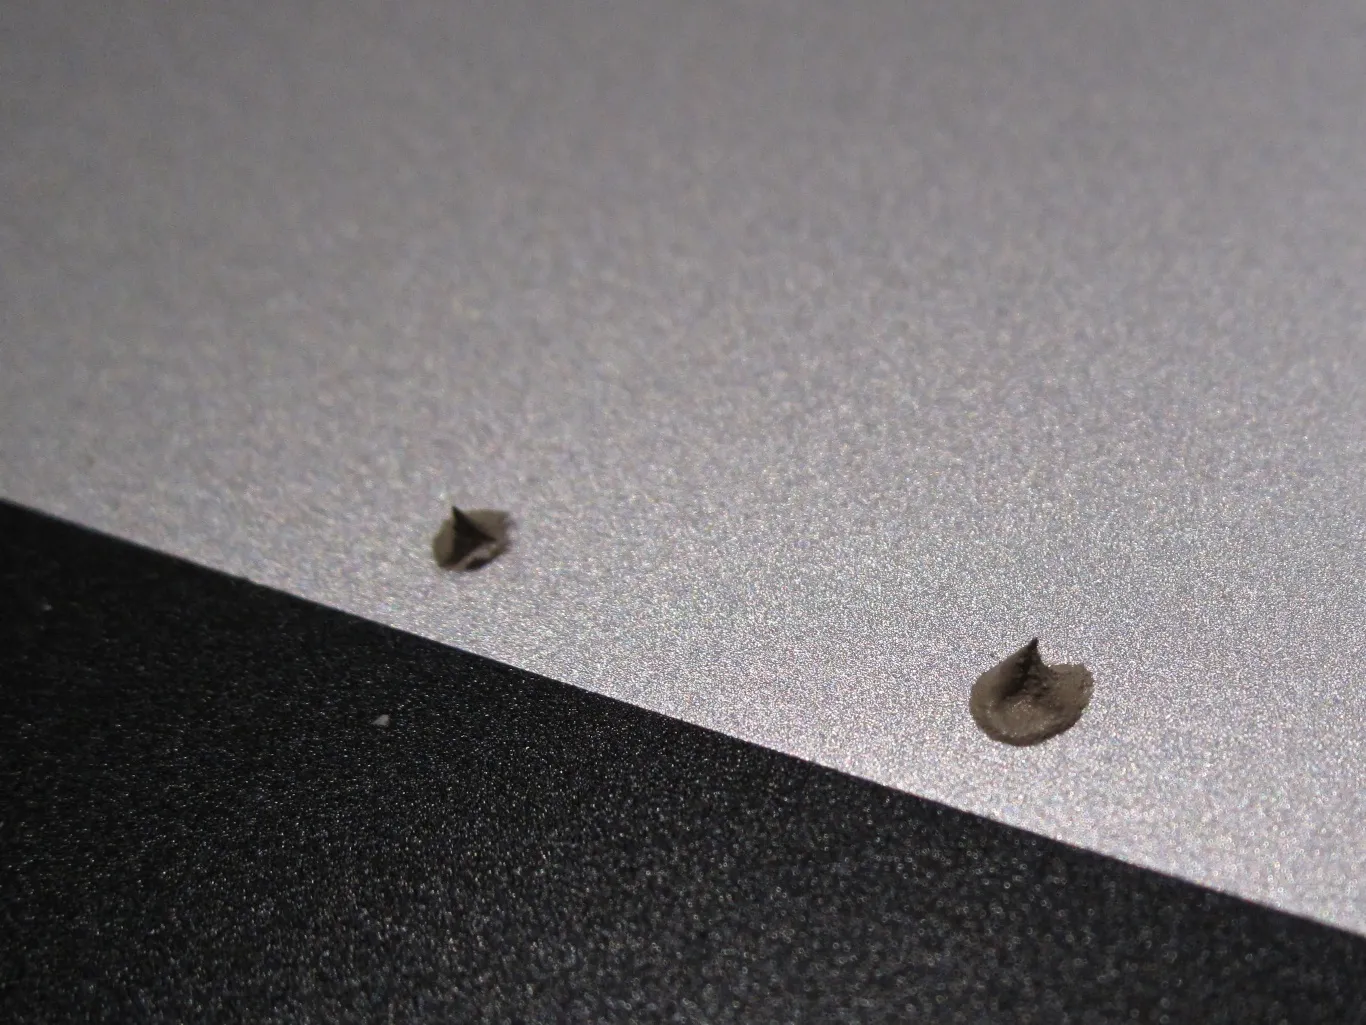
You only need a thin layer of conductive grease to do the job, and you absolutely do not want any excess grease getting onto the logic board where it could create computer-killing short circuits. So after the initial dab of grease, take a couple clean Q-Tips and wipe off almost all of the grease you put down. The contact points should look something like this when you’re finished:
Replace the bottom cover, secure it with the 10 screws.
And that’s it… my machine has’t made a noise since.
Before you have a field day with your machine, make sure you’re actually dealing with this particular issue. There are a few other potential causes for similar sounds… a dying hard-disk sometimes makes clicking sounds, and even a healthy hard disk will make a small clicking sound if you move the machine suddenly and it decides to park the heads. If your machine makes the clicking sound even when it’s powered down and specifically when you apply pressure to the bottom cover, then you’re probably dealing with the issue described in this post.
I’ve only tested this in my 15” model. I know the same issue has been documented on the 17”, not sure about the 13”. If you have the ticking problem / success fixing your non-15” model let me know in the comments and I will update the article accordingly.
A quick disclaimer: This fix might void your warranty, although if you’re sparing with the grease I’m not sure an Apple-tech would notice. Use common anti-static sense: Be sure to ground yourself before opening up your computer. Don’t touch anything inside that you don’t absolutely have to.
A few works / concepts / aesthetics related to the post-apocalyptic pirate internet.
Class discussion brought up the following:
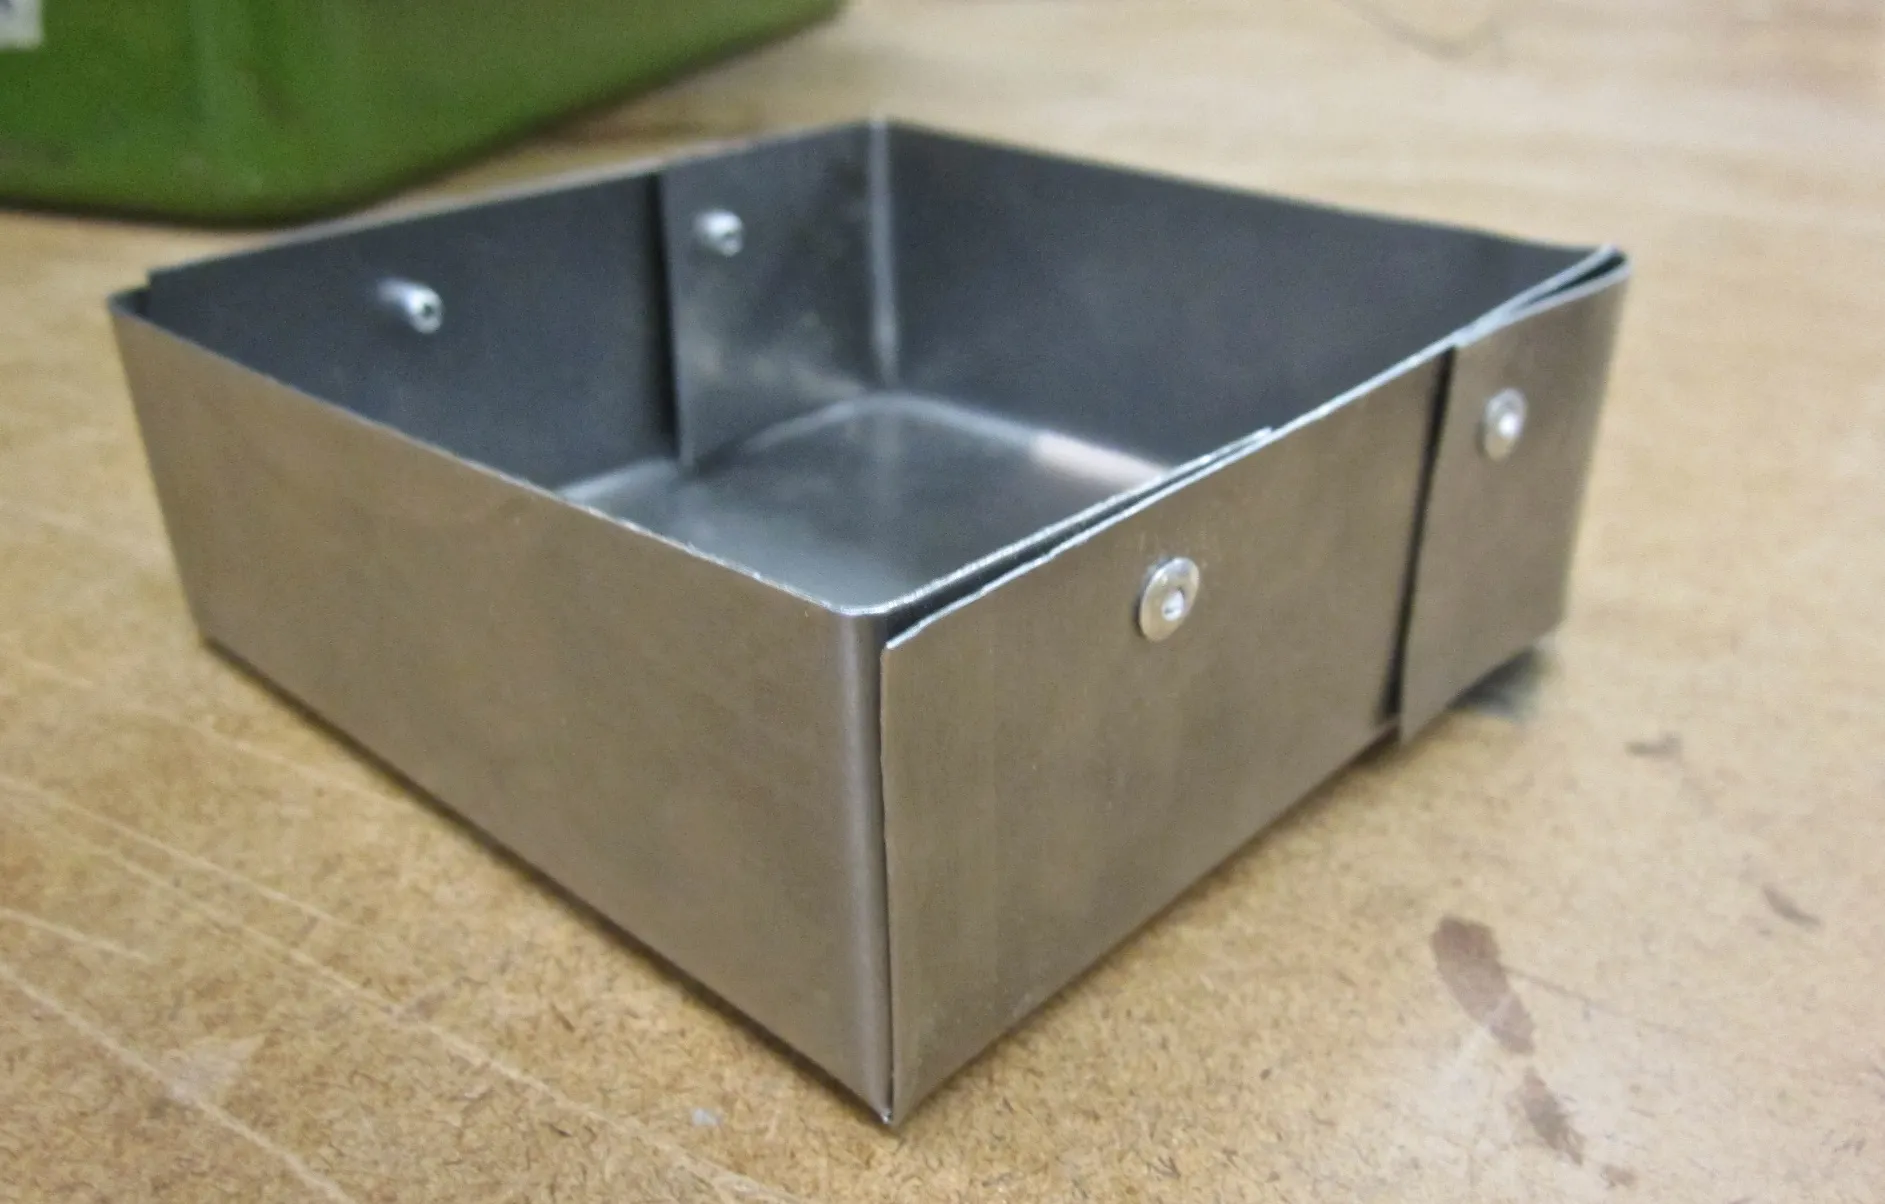
This week’s box is made out of… metal.
Work started with a nice big sheet of 20 gage cold-rolled A366 steel. This stuff also goes goes by the name “Alloy 1008” — which is 99% iron, with traces of carbon, manganese, phosphorus, copper, and sulfur.
(Big thanks to Hana Newman for organizing a group-buy for the class.)
I decided to make a slightly smaller box than Peter demonstrated in class — opting for a 4” square footprint, with 1.5” tall sides. I added 1/8” in each dimension to account for the width of the bends. I started by cutting a 7 1/8” square sheet on the large metal sheer. The cuts wind up much cleaner if you bias the handle of the shear inward on the down stroke.
and then folded up the sides on the hand brake. Like all things in the ITP shop, the brake was slightly out of whack. I should have loosened and adjusted the removable blocks to put them into better alignment before making the bends.
Next I snipped and folded over the end tabs. My bends were slightly off, though, so the box ended up with one tab on the inside, and the other tab on the outside. Next time I’ll make sure the tabs are folded more precisely with respect to the first two bends.
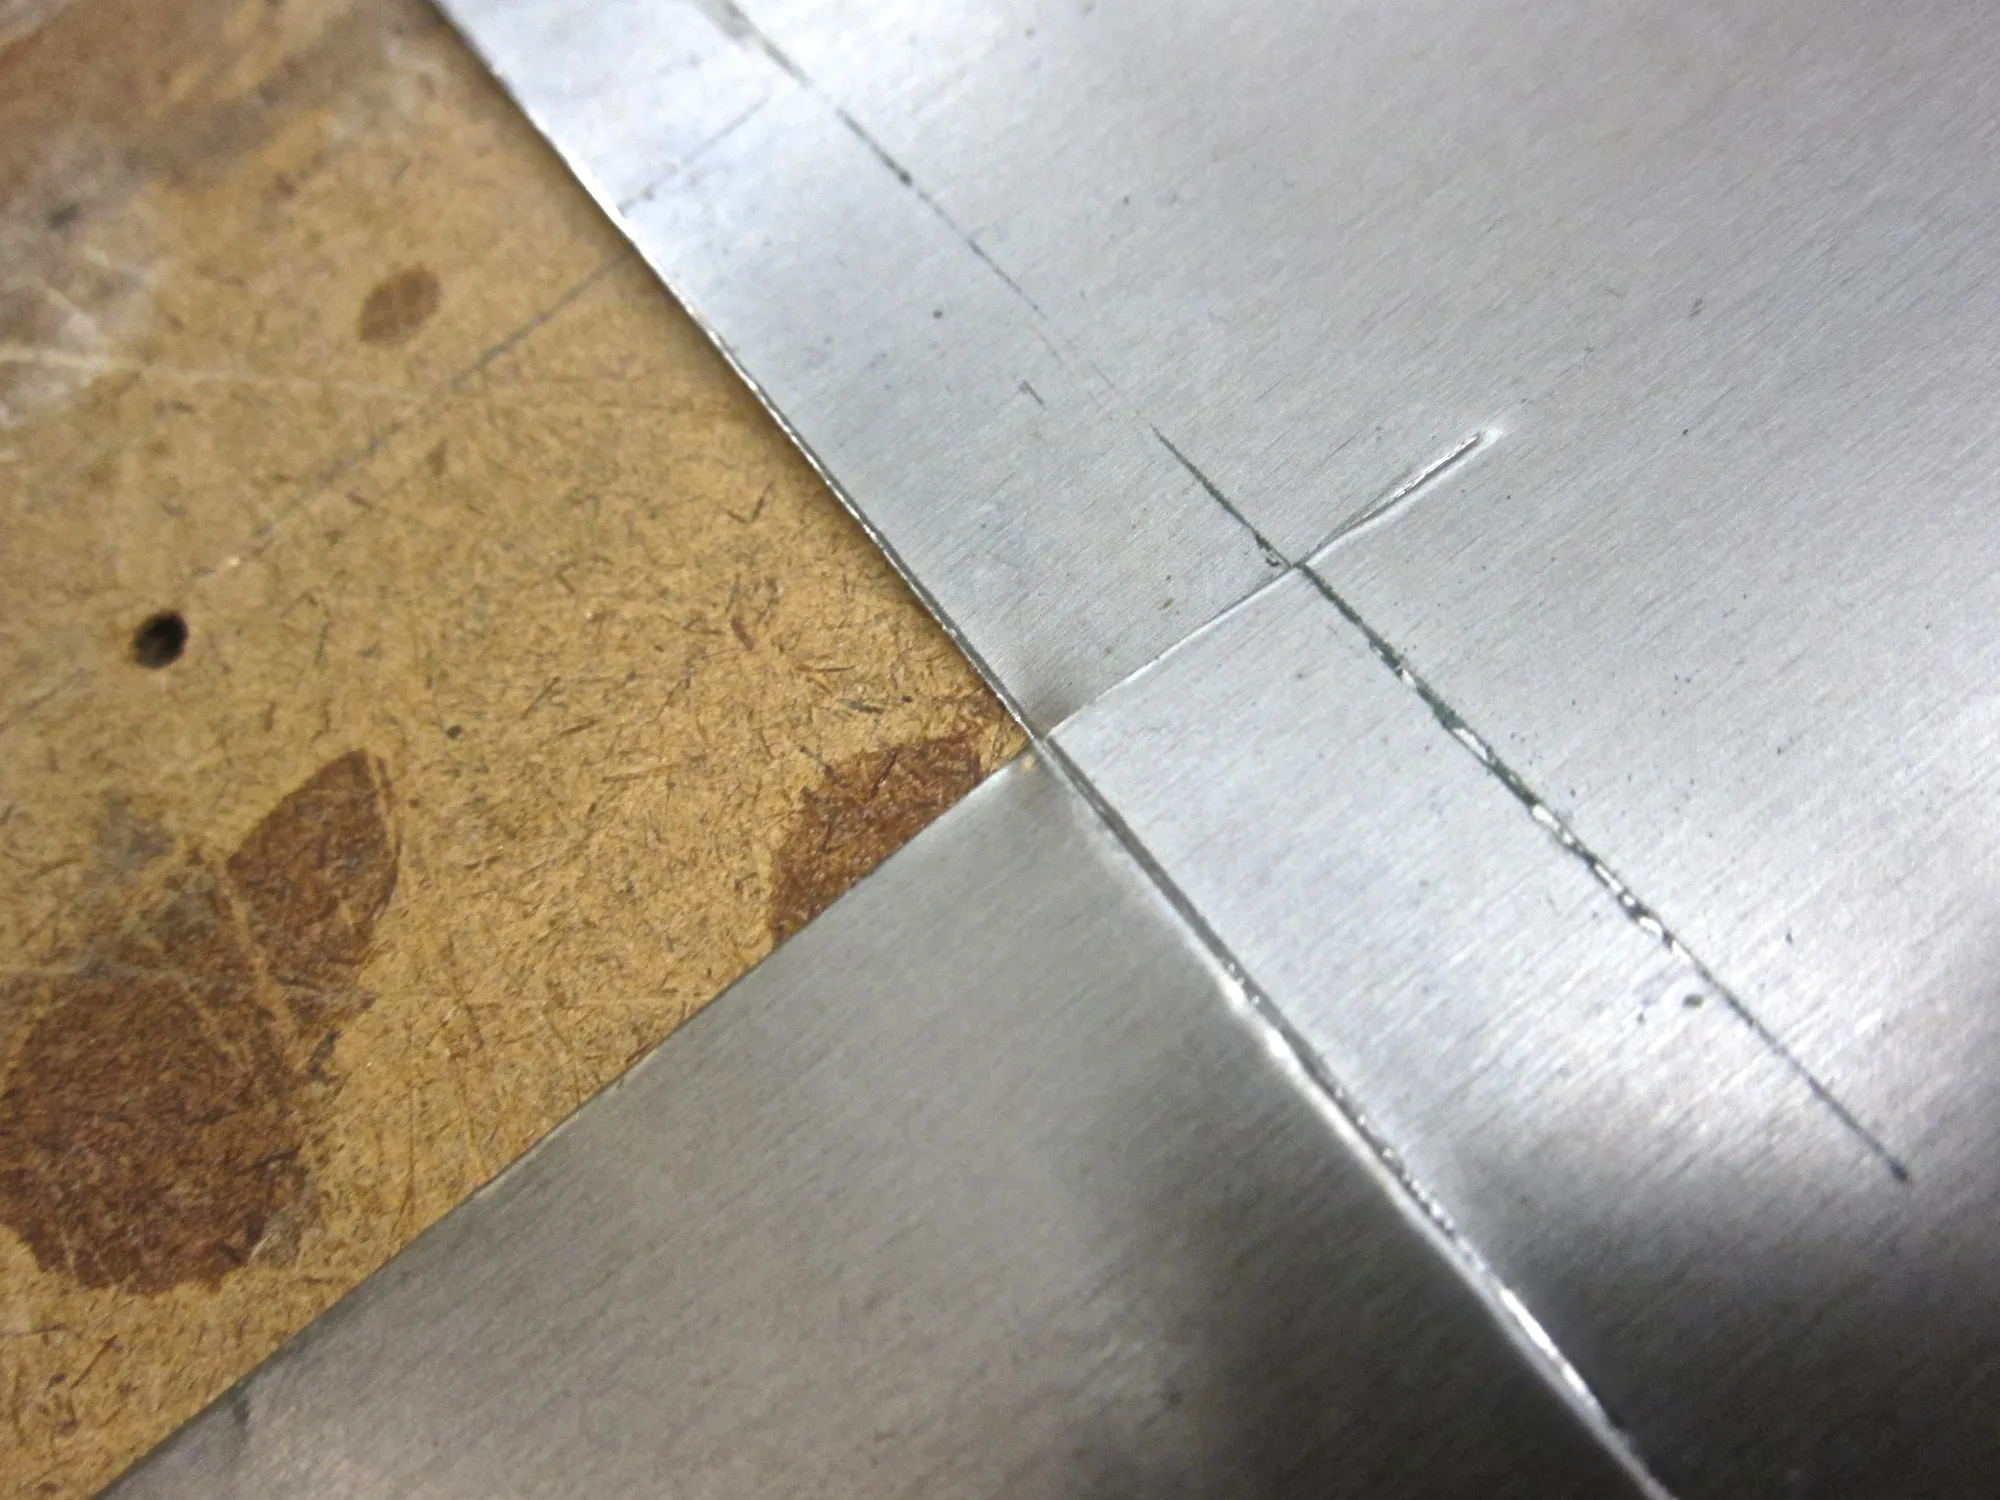
Finally, rivets were used to hold the box together. Drilling holes for the rivets was tricky (particularly when the tabs were “inside” the box). I built a small jig with some wood to drill into a and a metal pin (a screw, in this case) that I could brace the box against and use to push the tabs into alignment during the drilling process. The whole thing clamps to the corner of the table so the box could “sit” on an inside wall without interference from the other side of the box.
The jig is at left, a close up of the cut from the metal shear is at right.

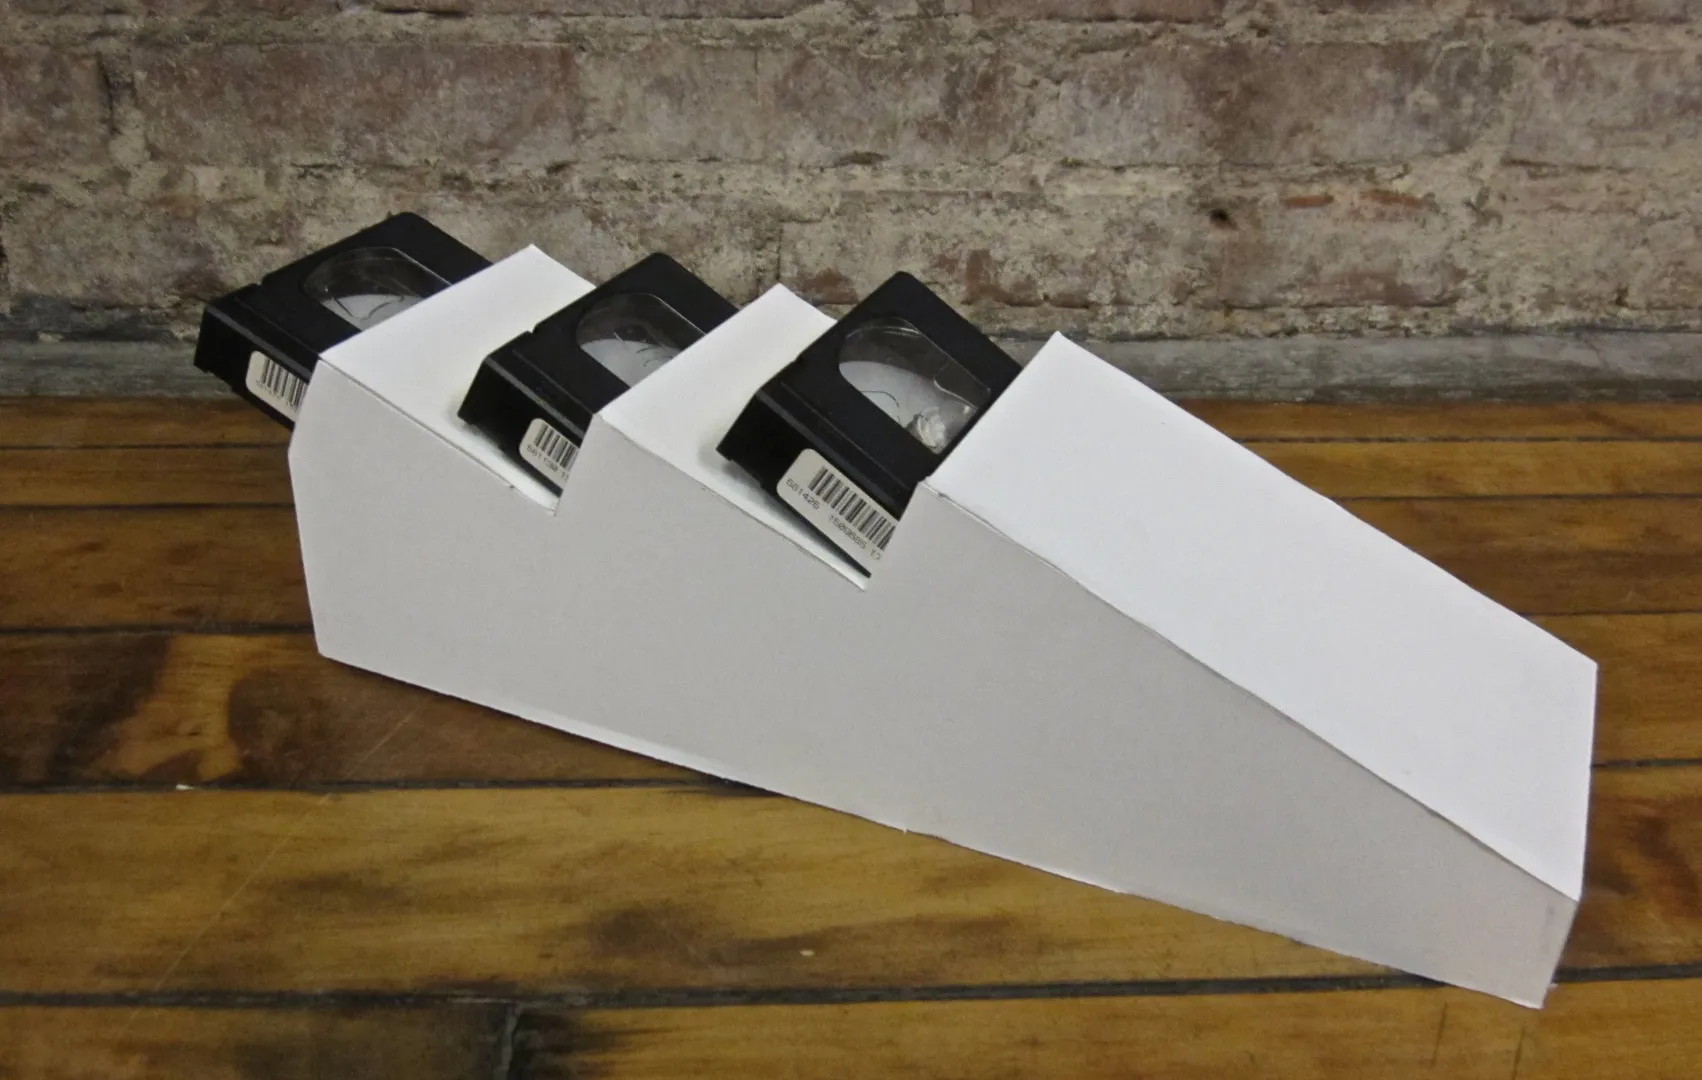
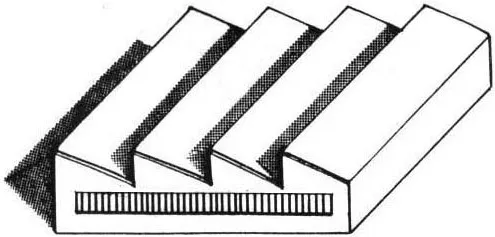
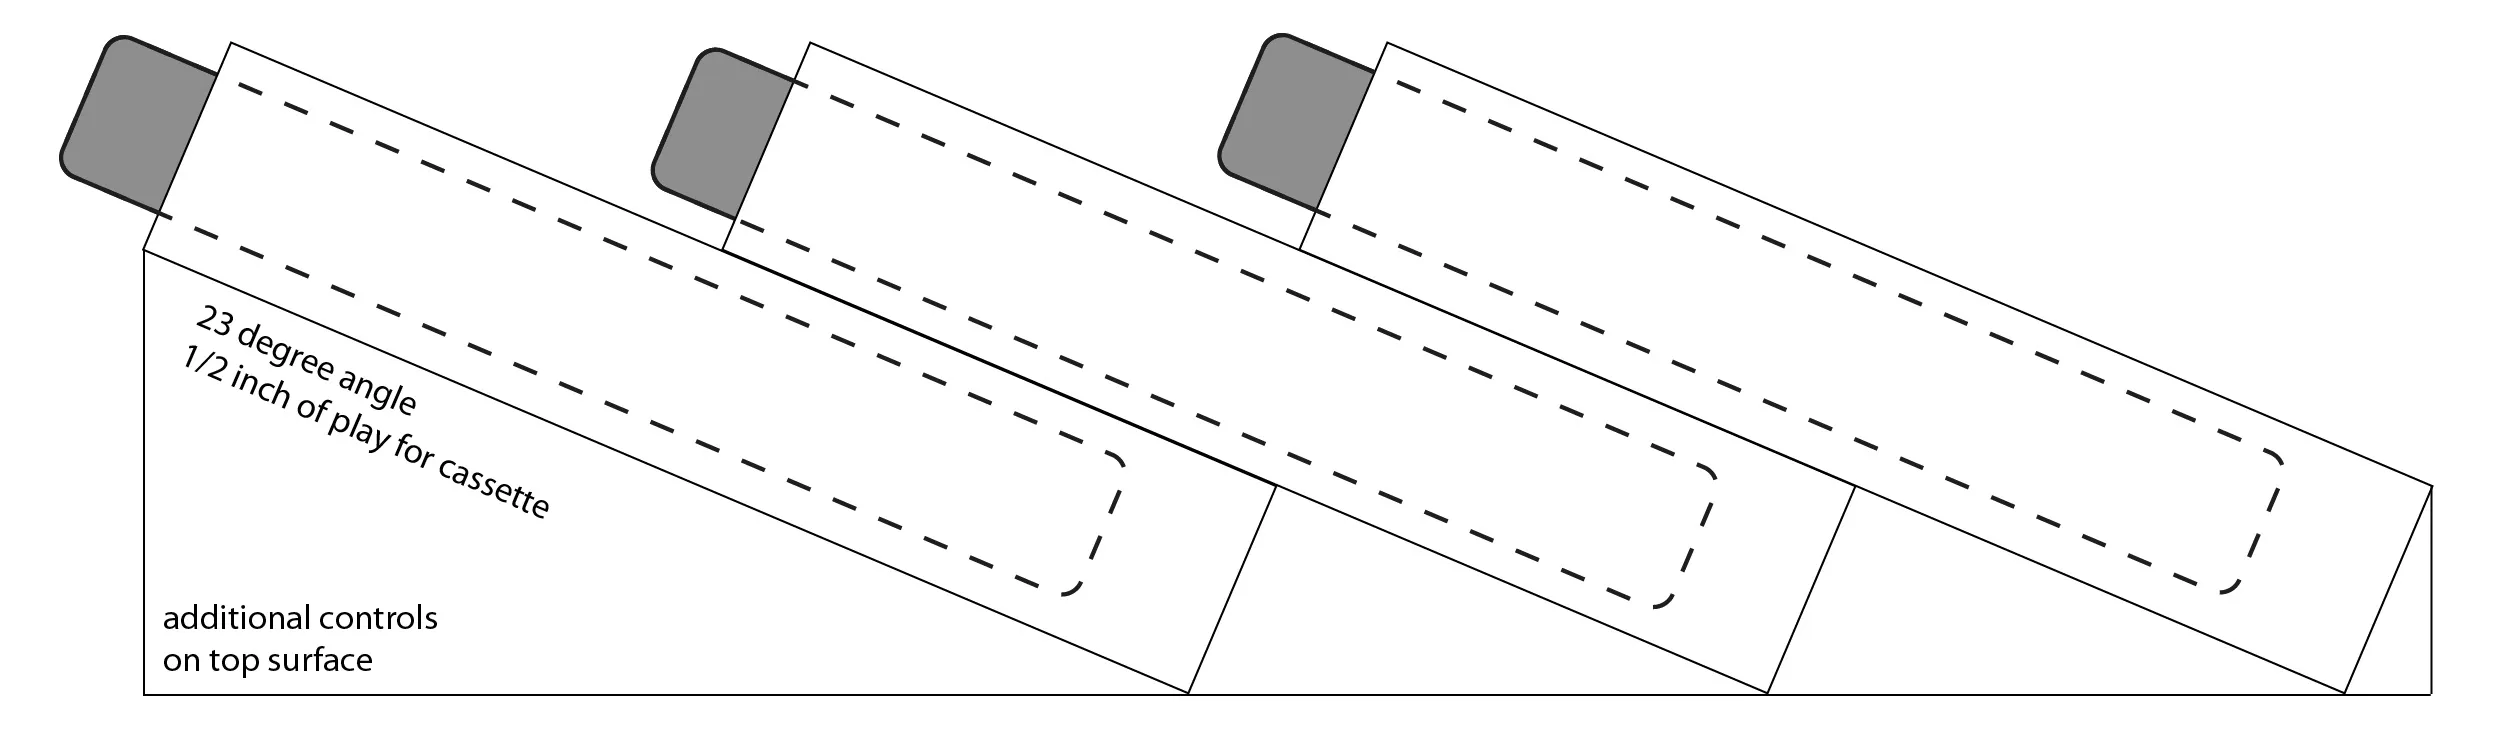
The VHS Can(n)on is coming together, albeit a bit slowly. At this point I’m still in the process of gathering parts. So far I’ve secured a consumer-grade Sony VHS player with a jog dial and nice big play / pause buttons. I’ve also picked up a WiiMote (for pointer tracking) and a handful of VHS tapes courtesy of Sofy (Standards like Clueless, the original Star Wars trilogy, and a Daft Punk video).
I still need a means of getting the composite video feed from the VHS player into my computer (and from there into Processing or OpenFrameworks).
I’m sifting through a bunch of different options from B&H.
Once that box is in hand, I’ll have enough to implement the most basic elements of the system. It’s important to do this soon since I’m not yet sure how much I’ll have to hack up the VHS player’s interface to build a usable set of interactions.