Computational Cameras and I have parted ways. I’m sure I’ll end up doing my share of pixel munging as I start work on Thesis II.
Ten Face-Related Ideas and One Implementation
Eric MikaFilm Faceprints
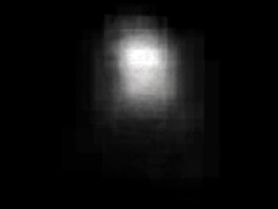
(implemented and shown below) Run face detection on film frames, grabbing full-size frames in which non-face areas are masked off. Average these frames together to generate a single-frame representation of presence and characters over the duration of the film. This leaves you with a kind of thumbprint of the film and it’s characters. The results are kind of anticlimactic, there are only vague shadows of faces. A failed experiment, but brings to mind some more interesting directions of approach to the content.
(Animating the accumulation of the average, scaling all of the faces to the same dimension before averaging — or maybe ditching the averaging idea and trying a grid arrangement that would reduce a film’s narrative to a series of faces.)
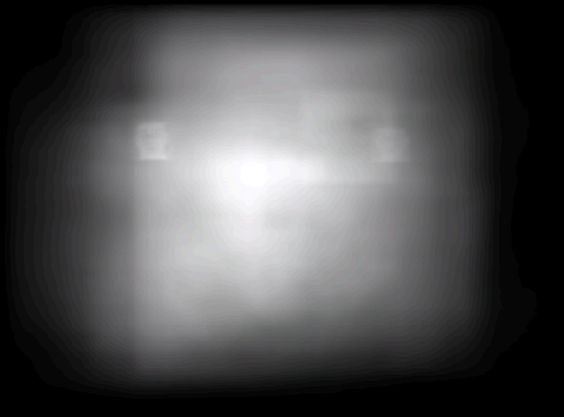
Titicut Follies is at top. Bottom left is an excerpt from a film about Abraham Lincoln, bottom right is Yellow Submarine.
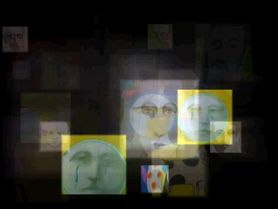
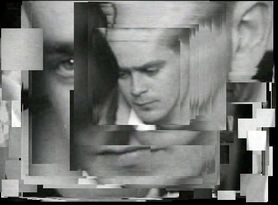
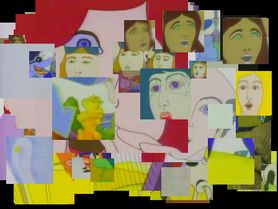
Perhaps more interesting are the algorithms leftovers. As it runs, the latest faces are dumped into a buffer and drawn to the screen. A couple averages in progress are shown below:
Here is the rather messy source code.
Quantify Contact
Run face detection on the contents of your computer screen. Log how often faces are encountered in web browsing / photo editing / whatever. In this way the relative loneliness of extended sessions in front of a machine could be quantified.
Curb Paranoia
Implement a face-detecting and obfuscating filter at a very low level (somewhere in the camera driver, probably). Pseudo-privacy protection
Quantifibate
Run face detection on your laptop’s camera all the time. Since computers tend to be left on, “uptime” doesn’t say much about the hours per day sunk into these machines. Face detection could give more accurate statistics about presence / attention.
Tenso
Automate the face swapping / tenso meme.
Almost Face
Go through large sets of face-tagged images (an iPhoto library, for example) and hand-pick all of the false positives to build a collection of almost-faces.
Street View
Process Google Street View panoramas for faces. Hit rate might be a bit low since google blurs faces, but it would be interesting to build a map of geolocated faces.
Street View Automatic
Eric MikaWhy is it always daytime in Google Street View?
The disagreement between Street View’s 100:0 ratio of light to dark and my window’s less optimistic 50:50 ratio has been particularly jarring lately. What a tax on our brittle circadian rhythms!
I have created a bookmarklet to solve the simpler (street view) half of this disparity. Now, you can push a button to instantly cast any Street View scene into a weak approximation of darkness. The degree of night is based on what time it actually is in the corner of the world you’re viewing, combined with information on when the sun will rise or set.
An open Street View window, left unattended, will now cycle from day, to night, and back again, indefinitely. No longer will you leave the house under the false promise of daylight at your destination.
The algorithm is operating on the four sample scenes above. If you’d like to give it a try, drag and drop the link below into your bookmarks bar (for quick access) or right click and add it to your bookmarks (for less obtrusive access).
drag and drop the below link to your bookmarks bar
drag and drop the above link to your bookmarks bar
Next, navigate to Google Maps, and get into a Street View as you would otherwise. Once the view has loaded, give the new Street View Automatic link in your bookmarks bar a click to show the scene in its true (and current) light. Of course, if it’s actually daytime, you won’t see much change at all. The code also won’t work on embedded maps or portable devices.
My thanks to Jonathan Stott of Earthtools for making his excellent lat / lon to local time and sunrise / sunset API services available free of charge to the public.
Your World of Text
Eric MikaI spent twenty minutes trying to remember the name of this brilliant, unmoderated, real-time, infinitely-large canvas of collaborative and anti-collaborative text. It’s Your World of Text by Andrew Badr.
If you run out of room, you can scroll to a fresh plot of page à la Google Maps.
Even more brilliant, Andrew released the source a while back. Interesting to see that it’s built on Django, and that clients keep sync by polling the server instead of some kind of pushed data from the server via Comet or a hidden socket.
Upload to Flickr from Processing
Eric Mika
About The PImage Uploader
I’ve attached a quick Processing sketch that uploads PImages from a camera directly to Flickr each time you click the mouse.
The actually upload process is pretty simple — it just involves posting a bunch of bytes over HTTP to a specific URL. The hard part is getting Flickr to believe that you are who you say you are so that it will accept the images you upload.
That’s where this code is meant to help.
In order to upload images to a Flickr account, your app will need write permission. In order to get write permission, you’ll need to go through the authentication process.
Basically, the first time your app wants to upload it will open up a URL on the Flickr website prompting you to log in and “allow” the app to do what it wants to do. You may be familiar with this procedure if you’ve had to authenticate third party apps that tie into Flickr (such as iPhoto or a desktop flickr uploader). In the case of the attached code, Processing opens the authentication link for you, and then gives you 15 seconds to approve the app on Flickr’s website before continuing on its way.
After this, it stores the authentication data in a text file (called token.txt) local to the Processing sketch, so that you won’t have to go through the online authentication process each time you run the app. I’ve encapsulated this process into a single function called authenticate() to make things as simple as possible. If the token is lost or becomes corrupted, the app will automatically try to fetch a new one the next time it runs. (Note that you should not distribute any sketches with your own generated token file!)
The code makes use of a Flickr library for Java called flickrj. Since flickrj is a generic Java library and isn’t designed specifically for Processing, its use is not quite as intuitive as you’re accustomed to. For one, the steps to use the library with your sketch are a bit different. Instead of putting files in your ~/Documents/Processing/libraries folder, you’ll need to download the .jar file from the flickrj website and drag and drop it onto your sketch window. This creates a folder called “code” inside your sketch folder with a copy of the .jar file inside for your sketch to reference as needed.
If you prefer, you can create the folder and copy the .jar file manually. You’ll end up with the same setup as if you dragged and dropped the file. Also note that you’ll never see anything appear in the “import” menu list since flickrj wasn’t built with Processing in mind. The flickrj jar is included in the zipped uploader code below to make your life easier.
The API / Library Conundrum
The amount of code and number steps involved in getting the necessary authorization is kind of ridiculous. It’s easy to imagine a range of places to improve upon the library.
Flickrj is a pretty direct mirror to the official Flickr API, and that’s how most API libraries are designed. It seems to be designed for experienced Java programmers working on large-scale projects instead of the quick and dirty sketches typical to Processing work. It’s tough to find exactly the right balance between a library that makes sense relative to the official API, and one that adds new features or code and leverages the paradigms of a particular programming language or framework.
For example, a Processing-specific library might incorporate a threaded image downloader that could return arrays of PImages from a given query. It could also wrap up the authorizations into a few lines of code as outlined in this post. These Processing-esque abstractions on top of Flickr’s own API abstractions add a lot of code and maintenance liabilities to our hypothetical library — but it would certainly open things up for beginner coders.
My Processing to-do list is pretty long, but I’ll add a new Flickr library filed under “maybe someday”.
The Code
The core of the sketch is shown below, but note that it will be easiest to download flickr_uploader.zip for testing since it includes the flickrj library. The code looks a bit lengthy and convoluted, but it mostly consists of helper functions to take care of the authentication process and image compression to make the upload process as simple as possible — and the helper functions should be reusable without modification, so all you really need to worry about is creating the Flickr object, calling the authentication function, and then uploading to your heart’s desire.
// Simple sketch to demonstrate uploading directly from a Processing sketch to Flickr.
// Uses a camera as a data source, uploads a frame every time you click the mouse.

import processing.video.*;
import javax.imageio.*;
import java.awt.image.*;
import com.aetrion.flickr.*;

// Fill in your own apiKey and secretKey values.
String apiKey = "********************************";
String secretKey = "****************";

Flickr flickr;
Uploader uploader;
Auth auth;
String frob = "";
String token = "";

Capture cam;

void setup() {
  size(320, 240);

  // Set up the camera.
  cam = new Capture(this, 320, 240);

  // Set up Flickr.
  flickr = new Flickr(apiKey, secretKey, (new Flickr(apiKey)).getTransport());

  // Authentication is the hard part.
  // If you're authenticating for the first time, this will open up
  // a web browser with Flickr's authentication web page and ask you to
  // give the app permission. You'll have 15 seconds to do this before the Processing app
  // gives up waiting fr you.

  // After the initial authentication, your info will be saved locally in a text file,
  // so you shouldn't have to go through the authentication song and dance more than once
  authenticate();

  // Create an uploader
  uploader = flickr.getUploader();
}

void draw() {
  if (cam.available()) {
    cam.read();
    image(cam, 0, 0);
    text("Click to upload to Flickr", 10, height - 13);
  }
}

void mousePressed() {
  // Upload the current camera frame.
  println("Uploading");

  // First compress it as a jpeg.
  byte[] compressedImage = compressImage(cam);

  // Set some meta data.
  UploadMetaData uploadMetaData = new UploadMetaData();
  uploadMetaData.setTitle("Frame " + frameCount + " Uploaded from Processing");
  uploadMetaData.setDescription("To find out how, go to https://frontiernerds.com/upload-to-flickr-from-processing");
  uploadMetaData.setPublicFlag(true);

  // Finally, upload/
  try {
    uploader.upload(compressedImage, uploadMetaData);
  }
  catch (Exception e) {
    println("Upload failed");
  }

  println("Finished uploading");
}

// Attempts to authenticate. Note this approach is bad form,
// it uses side effects, etc.
void authenticate() {
  // Do we already have a token?
  if (fileExists("token.txt")) {
    token = loadToken();
    println("Using saved token " + token);
    authenticateWithToken(token);
  }
  else {
   println("No saved token. Opening browser for authentication");
   getAuthentication();
  }
}

// FLICKR AUTHENTICATION HELPER FUNCTIONS
// Attempts to authneticate with a given token
void authenticateWithToken(String _token) {
  AuthInterface authInterface = flickr.getAuthInterface();

  // make sure the token is legit
  try {
    authInterface.checkToken(_token);
  }
  catch (Exception e) {
    println("Token is bad, getting a new one");
    getAuthentication();
    return;
  }

  auth = new Auth();

  RequestContext requestContext = RequestContext.getRequestContext();
  requestContext.setSharedSecret(secretKey);
  requestContext.setAuth(auth);

  auth.setToken(_token);
  auth.setPermission(Permission.WRITE);
  flickr.setAuth(auth);
  println("Authentication success");
}


// Goes online to get user authentication from Flickr.
void getAuthentication() {
  AuthInterface authInterface = flickr.getAuthInterface();

  try {
    frob = authInterface.getFrob();
  }
  catch (Exception e) {
    e.printStackTrace();
  }

  try {
    URL authURL = authInterface.buildAuthenticationUrl(Permission.WRITE, frob);

    // open the authentication URL in a browser
    open(authURL.toExternalForm());
  }
  catch (Exception e) {
    e.printStackTrace();
  }

  println("You have 15 seconds to approve the app!");
  int startedWaiting = millis();
  int waitDuration = 15 * 1000; // wait 10 seconds
  while ((millis() - startedWaiting) < waitDuration) {
    // just wait
  }
  println("Done waiting");

  try {
    auth = authInterface.getToken(frob);
    println("Authentication success");
    // This token can be used until the user revokes it.
    token = auth.getToken();
    // save it for future use
    saveToken(token);
  }
  catch (Exception e) {
    e.printStackTrace();
  }

  // complete authentication
  authenticateWithToken(token);
}

// Writes the token to a file so we don't have
// to re-authenticate every time we run the app
void saveToken(String _token) {
  String[] toWrite = { _token };
  saveStrings("token.txt", toWrite);
}

boolean fileExists(String filename) {
  File file = new File(sketchPath(filename));
  return file.exists();
}

// Load the token string from a file
String loadToken() {
  String[] toRead = loadStrings("token.txt");
  return toRead[0];
}

// IMAGE COMPRESSION HELPER FUNCTION

// Takes a PImage and compresses it into a JPEG byte stream
// Adapted from Dan Shiffman's UDP Sender code
byte[] compressImage(PImage img) {
  // We need a buffered image to do the JPG encoding
  BufferedImage bufferedImage = new BufferedImage( img.width,img.height, BufferedImage.TYPE_INT_RGB );

  img.loadPixels();
  bufferedImage.setRGB(0, 0, img.width, img.height, img.pixels, 0, img.width);

  // Need these output streams to get image as bytes for UDP communication
  ByteArrayOutputStream baStream	= new ByteArrayOutputStream();
  BufferedOutputStream bos		= new BufferedOutputStream(baStream);

  // Turn the BufferedImage into a JPG and put it in the BufferedOutputStream
  // Requires try/catch
  try {
    ImageIO.write(bufferedImage, "jpg", bos);
  }
  catch (IOException e) {
    e.printStackTrace();
  }

  // Get the byte array, which we will send out via UDP!
  return baStream.toByteArray();
}
