NOC Midterm Concept: A physics-based drawing tool.
How to Hack Toy EEGs
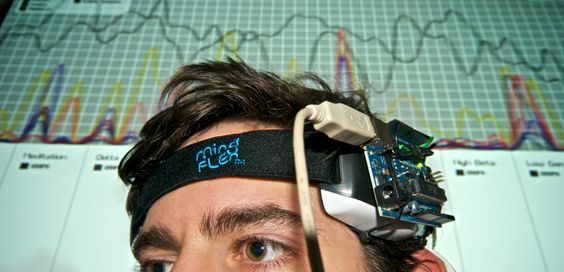
Eric MikaArturo Vidich, Sofy Yuditskaya, and I needed a way to read brains for our Mental Block project last fall. After looking at the options, we decided that hacking a toy EEG would be the cheapest / fastest way to get the data we wanted.
Here’s how we did it.
The Options
A non-exhaustive list of the consumer-level options for building a brain-computer interface:
 |  |  |  | |
|---|---|---|---|---|
| Description | Plans and software for building an EEG from scratch | Levitating ball game from Uncle Milton | Levitating ball game from Mattel | Official headset from NeuroSky |
| Attention / Meditation Values | No | Yes | Yes | Yes |
| EEG Power Band Values | Yes (roll your own FFT) | No | Yes | Yes |
| Raw wave values | Yes | No | No | Yes |
| Cost | $200+ | $75 (street) | $80 (street) | $200 |
Open EEG offers a wealth of hardware schematics, notes, and free software for building your own EEG system. It’s a great project, but the trouble is that the hardware costs add up quickly, and there isn’t a plug-and-play implementation comparable to the EEG toys.
The NeuroSky MindSet is a reasonable deal as well — it’s wireless, supported, and plays nicely with the company’s free developer tools.
For our purposes, though, it was still a bit spendy. Since NeuroSky supplies the EEG chip and hardware for the Force Trainer and Mind Flex toys, these options represent a cheaper (if less convenient) way to get the same data. The silicon may be the same between the three, but our tests show that each runs slightly different firmware which accounts for some variations in data output. The Force Trainer, for example, doesn’t output EEG power band values — the Mind Flex does. The MindSet, unlike the toys, also gives you access to raw wave data. However, since we’d probably end up running an FFT on the wave anyway (and that’s essentially what the EEG power bands represent), we didn’t particularly miss this data in our work with the Mind Flex.
Given all of this, I think the Mind Flex represents a sweet spot on the price / performance curve. It gives you almost all of the data the Mind Set for less than half the cost. The hack and accompanying software presented below works fine for the Force Trainer as well, but you’ll end up with less data since the EEG power values are disabled in the Force Trainer’s firmware from the factory.
Of course, the Mind Flex is supposed to be a black-box toy, not an officially supported development platform — so in order to access the actual sensor data for use in other contexts, we’ll need to make some hardware modifications and write some software to help things along. Here’s how.
But first, the inevitable caveat:
Use extreme caution when working with any kind of voltage around your brain, particularly when wall power is involved. The risks are small, but to be on the safe side you should only plug the Arduino + Mind Flex combo into a laptop running on batteries alone. (My thanks to Viadd for pointing out this risk in the comments.) Also, performing the modifications outlined below means that you’ll void your warranty. If you make a mistake you could damage the unit beyond repair. The modifications aren’t easily reversible, and they may interfere with the toy’s original ball-levitating functionality.
However, I’ve confirmed that when the hack is executed properly, the toy will continue to function — and perhaps more interestingly, you can skim data from the NeuroSky chip without interfering with gameplay. In this way, we’ve confirmed that the status lights and ball-levitating fan in the Mind Flex are simply mapped to the “Attention” value coming out of the NeuroSky chip.
The Hardware
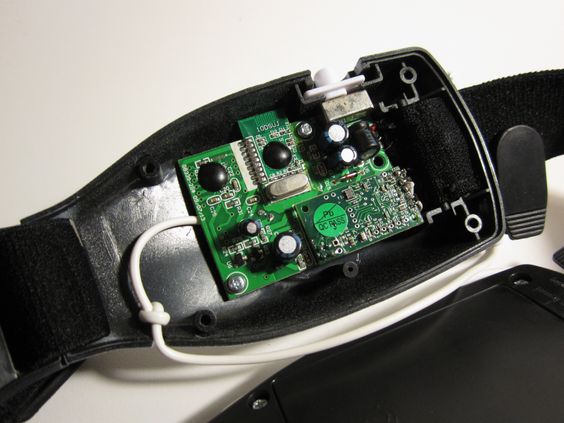
Here’s the basic layout of the Mind Flex hardware. Most of the action is in the headband, which holds the EEG hardware. A micro controller in the headband parses data from the EEG chip and sends updates wirelessly to a base station, where a fan levitates the ball and several LEDs illuminate to represent your current attention level.
This schematic immediately suggests several approaches to data extraction. The most common strategy we’ve seen is to use the LEDs on the base station to get a rough sense of the current attention level. This is nice and simple, but five levels of attention just doesn’t provide the granularity we were looking for.
A quick aside: Unlike the Mind Flex, the Force Trainer has some header pins (probably for programming / testing / debugging) which seem like an ideal place to grab some data. Others have reported success with this approach. We could never get it to work.
We decided to take a higher-level approach by grabbing serial data directly from the NeuroSky EEG chip and cutting the rest of the game hardware out of the loop, leaving a schematic that looks more like this:
The Hack
Parts list:
- 1 x Mind Flex
- 3 x AAA batteries for the headset
- 1 x Arduino (any variety), with USB cable
- 2 x 12" lengths of solid core hookup wire (around #22 or #24 gauge is best)
- A PC or Mac to monitor the serial data
Software list:
- Arduino Brain Library (download here)
- Optional: Processing Brain Visualizer (download here)
The visualizer requires Processing to be installed.
The video below walks through the whole process. Detailed instructions and additional commentary follow after the video.
Step-by-step:
1. Disassembly
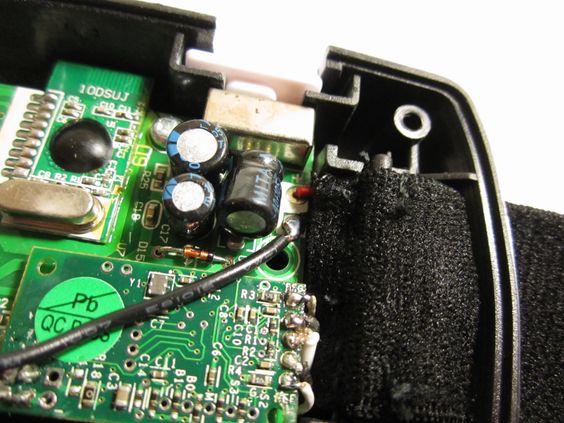
Grab a screwdriver and crack open the left pod of the Mind Flex headset. (The right pod holds the batteries.)
2. The T Pin
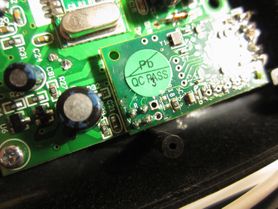
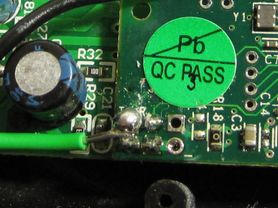
The NeuroSky Board is the small daughterboard towards the bottom of the headset. If you look closely, you should see conveniently labeled T and R pins — these are the pins the EEG board uses to communicate serially to the microcontroller on the main board, and they’re the pins we’ll use to eavesdrop on the brain data. Solder a length of wire (carefully) to the “T” pin. Thin wire is fine, we used #24 gauge. Be careful not to short the neighboring pins.
3. Common Ground
Your Arduino will want to share ground with the Mind Flex circuit. Solder another length of wire to ground — any grounding point will do, but using the large solder pad where the battery’s ground connection arrives at the board makes the job easier. A note on power: We’ve found the Mind Flex to be inordinately sensitive to power… our initial hope was to power the NeuroSky board from the Arduino’s 3.3v supply, but this proved unreliable. For now we’re sticking with the factory configuration and powering the Arduino and Mind Flex independently.
4. Strain relief and wire routing
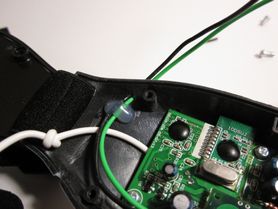
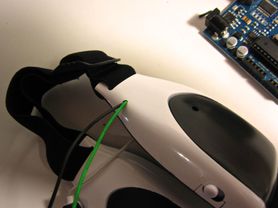
We used a dab of hot glue to act as strain relief for the new wires, and drilled a hole in the case for the two wires to poke through after the case was closed. This step is optional.
5. Hook up the Arduino
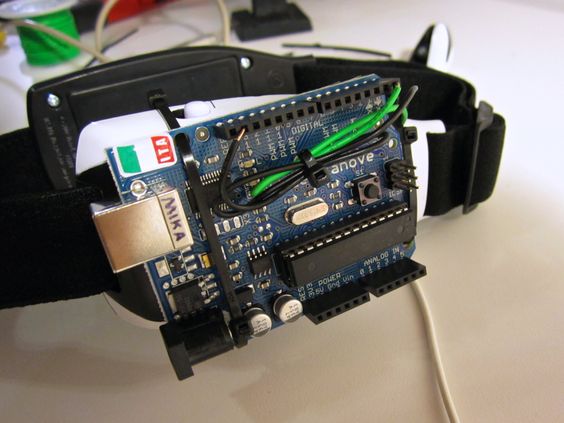
The wire from the Mind Flex’s “T” pin goes into the Arduino’s RX pin. The ground goes… to ground. You may wish to secure the Arduino to the side of the Mind Flex as a matter of convenience. (We used zip ties.)
That’s the extent of the hardware hack. Now on to the software. The data from the NeuroSky is not in a particularly friendly format. It’s a stream of raw bytes that will need to be parsed before they’ll make any sense. Fate is on our side: the packets coming from the Mind Flex match the structure from NeuroSky’s official Mindset documentation. (See the mindset_communications_protocol.pdf document in the Mindset developer kit if you’re interested.) You don’t need to worry about this, since I’ve written an Arduino library that makes the parsing process as painless as possible.
Essentially, the library takes the raw byte data from the NeuroSky chip, and turns it into a nice ASCII string of comma-separated values.
6. Load up the Arduino
Download and install the Arduino Brain Library — it’s available here. Open the BrainSerialOut example and upload it to your board. (You may need to disconnect the RX pin during the upload.) The example code looks like this:
#include <Brain.h>

// Set up the brain parser, pass it the hardware serial object you want to listen on.
Brain brain(Serial);

void setup() {
  // Start the hardware serial.
  Serial.begin(9600);
}

void loop() {
  // Expect packets about once per second.
  // The .readCSV() function returns a string (well, char *)
  // listing the most recent brain data, in the following format:
  // "signal strength, attention, meditation, delta, theta, low alpha,
  //  high alpha, low beta, high beta, low gamma, high gamma"
  if (brain.update()) {
    Serial.println(brain.readCSV());
  }
}
7. Test
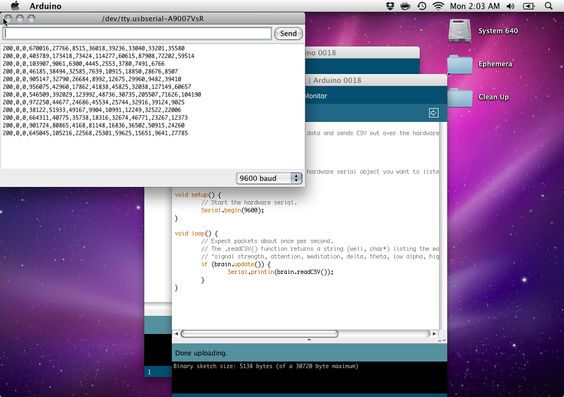
Turn on the Mind Flex, make sure the Arduino is plugged into your computer, and then open up the Serial Monitor. If all went well, you should see the following:
Here’s how the CSV breaks down:
“signal strength, attention, meditation, delta, theta, low alpha, high alpha, low beta, high beta, low gamma, high gamma”
(More on what these values are supposed to mean later in the article. Also, note that if you are hacking a Force Trainer instead of a Mind Flex, you will only see the first three values — signal strength, attention, and meditation.)
If you put the unit on your head, you should see the “signal strength” value drop to 0 (confusingly, this means the connection is good), and the rest of the numbers start to fluctuate.
8. Visualize
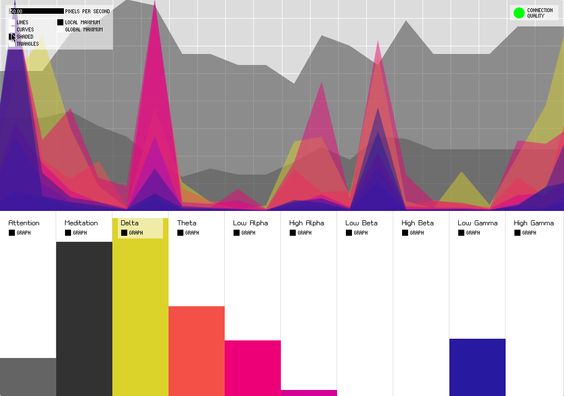
As exciting as the serial monitor is, you might think, “Surely there’s a more intuitive way to visualize this data!” You’re in luck: I’ve written a quick, open-source visualizer in Processing which graphs your brain activity over time (download). It’s designed to work with the BrainSerialOut Arduino code you’ve already loaded.
Download the code, and then open up the brain_grapher.pde file in Processing. With the Mind Flex plugged in via USB and powered on, go ahead and run the Processing sketch. (Just make sure the Arduino IDE’s serial monitor is closed, otherwise Processing won’t be able to read from the Mind Flex.) You may need to change the index of the serial list array in the brain_grapher.pde file, in case your Arduino is not the first serial object on your machine:
serial = new Serial(this, Serial.list()[0], 9600);
You should end up with a screen like this:
About the data
So what, exactly, do the numbers coming in from the NeuroSky chip mean?
The Mind Flex (but not the Force Trainer) provides eight values representing the amount of electrical activity at different frequencies. This data is heavily filtered / amplified, so where a conventional medical-grade EEG would give you absolute voltage values for each band, NeuroSky instead gives you relative measurements which aren’t easily mapped to real-world units. A run down of the frequencies involved follows, along with a grossly oversimplified summary of the associated mental states.
- Delta (1-3Hz): sleep
- Theta (4-7Hz): relaxed, meditative
- Low Alpha (8-9Hz): eyes closed, relaxed
- High Alpha (10-12Hz)
- Low Beta (13-17Hz): alert, focused
- High Beta (18-30Hz)
- Low Gamma (31-40Hz): multi-sensory processing
- High Gamma (41-50Hz)
In addition to these power-band values, the NeuroSky chip provides a pair of proprietary, black-box data values dubbed “attention” and “mediation”. These are intended to provide an easily-grokked reduction of the brainwave data, and it’s what the Force Trainer and Mind Flex actually use to control the game state. We’re a bit skeptical of these values, since NeuroSky won’t disclose how they work, but a white paper they’ve released suggests that the values are at least statistically distinguishable from nonsense.
Here’s the company line on each value:
Attention:
Indicates the intensity of a user’s level of mental “focus” or “attention”, such as that which occurs during intense concentration and directed (but stable) mental activity. Distractions, wandering thoughts, lack of focus, or anxiety may lower the Attention meter levels.
Meditation:
Indicates the level of a user’s mental “calmness” or “relaxation”. Meditation is related to reduced activity by the active mental processes in the brain, and it has long been an observed effect that closing one’s eyes turns off the mental activities which process images from the eyes, so closing the eyes is often an effective method for increasing the Meditation meter level. Distractions, wandering thoughts, anxiety, agitation, and sensory stimuli may lower the Meditation meter levels.
At least that’s how it’s supposed to work. We’ve found that the degree of mental control over the signal varies from person to person. Ian Cleary, a peer of ours at ITP, used the Mind Flex in a recent project. He reports that about half of the people who tried the game were able to exercise control by consciously changing their mental state.
The most reasonable test of the device’s legitimacy would be a comparison with a medical-grade EEG. While we have not been able to test this ourselves, NeuroSky has published the results of such a comparison. Their findings suggest that the the NeuroSky chip delivers a comparable signal. Of course, NeuroSky has a significant stake in a positive outcome for this sort of test.
And there you have it. If you’d like to develop hardware or software around this data, I recommend reading the documentation that comes with the brain library for more information — or browse through the visualizer source to see how to work with the serial data. If you make something interesting using these techniques, I’d love to hear about it.
March 2013 Update
Almost three years on, I think I need to close the comments since I don’t have the time (or hardware on hand) to keep up with support. Please post future issues on the GitHub page of the relevant project:
https://github.com/kitschpatrol/brain
https://github.com/kitschpatrol/brain-grapher
Most issues I’m seeing in the comments seem like the result of either soldering errors or compatibility-breaking changes to the Processing and Arduino APIs. I’ll try to stay ahead of the latter on GitHub and will be happy to accept pull requests to keep the code up to date and working.
Thanks everyone for your feedback and good luck with your projects.
POS Shuffler
Eric MikaHomework #2: The digital cut-up. Write a program that reads in and creatively re-arranges the content of one or more source texts. What is the unit of your cut-up technique? (the word, the line, the character? something else?) How does your procedure relate (if at all) to your choice of source text? Feel free to build on your assignment from last week.
I wanted to build a cut-up machine that was as grammatically and syntactically non-invasive as possible, while still significantly munging the source text.
So I decided to shuffle the text in a way that treated parts of speech as sacred — the words could fall where they may, but if the first word was a noun in the source text, it had better be replaced with a noun in the output. If the second word was a verb, nothing but a verb from elsewhere in the text should take its place, and so on.
Programmatically deriving a word’s part of speech turns out to be a major issue, so I leaned on NLTK to take care of this. It actually does a pretty decent job. From there it’s just a matter of storing lists of the words in a dictionary keyed to each part of speech, shuffling them, and then reconstituting the text.
I ran Obama’s most recent state of the union address through my algorithm. It’s formal enough and carefully constructed enough so as not to pose a significant challenged to NLTK’s Brown Corpus trained part of speech tagger. Also, I was struck by how much the output resembles the famous Bushisms, albeit with a lingering Obama-esque tinge.
Here’s some output:
Bloody Biden, succeed. Run Constitution, convictions from America, were moments, But great Allies: tested. union. declares during on time to look, the prosperity must time to union. history of the struggle at our For Sunday one leaders, our people have fulfilled all Bull Union chose done so of hesitations despite progress And America and we are turned again on the war that call and midst; in marchers as inevitable anything and fellow state. they’s tempting to move very of the guests and president at our victory distinguished civil, that President were back done to Tuesday and when the Beach was tested back about Our Omaha but these Americans great beaten that duty. Congress, nation crashed forward so of These Madame the future was of certain. tranquility. And first years periods was landed because doubt. Again, the depression was assume and Congress Speaker was rights on destined the market of our moments and the courage in our Black and at this our fears and divisions, our disagreements and our members, Vice prevailed that we have to answer always of one strife And 220 times.
They, It have When and much, we shall give information’s strength.
Sample output from the full text of Obama’s 2010 state of the union is also available here. The original text is also available for comparison.
The source code follows. Pretty simple, NLTK does most of the heavy lifting.
import sys
import nltk
import random
import re

# Grab a file from standard input, dump it in a string.
source_text = sys.stdin.read()

# Use NLTK to make some guesses about each word's part of speech.
token_text = nltk.word_tokenize(source_text)
pos_text = nltk.pos_tag(token_text)

# Set up a dictionary where each key is a POS holding a list
# of each word of that type from the text.
pos_table = dict()

for tagged_word in pos_text:
  # Create the list, if it doesn't exist already.
  if tagged_word[1] not in pos_table:
    pos_table[tagged_word[1]] = list()

  pos_table[tagged_word[1]].append(tagged_word[0])

# Scramble the word lists.
for pos_key in pos_table:
  random.shuffle(pos_table[pos_key])

# Rebuild the text.
output = str()

for tagged_word in pos_text:
  # Take the last word from the scrambled list.
  word = pos_table[tagged_word[1]].pop()

  # Leave out the space if it's punctuation.
  if not re.match("[\.,;:'!?]", word):
    output +=  " "

  # Accumulate the words
  output +=  word

# Remove white space.
output = output.strip()

print output
Vinyl as Visualization
Eric MikaA vinyl record, magnified. From Chris Supranowitz’s OPT 307 Final Project.
One of [Arthur C.
Clarke’s laws of prediction](https://en.wikipedia.org/wiki/Clarke’s_three_laws) states that “any sufficiently advanced technology is indistinguishable from magic.” There’s something bootstrappy about one sufficiently advanced technology (SEM) laying bare the magic from a formerly advanced technology (Vinyl). In this case, to see the waveform etched in the vinyl is to understand how the medium works in a more-than-conceptual way. No magic required.
Yet the magnifier doesn’t shed the same revelatory light on a compact disc. There’s another layer of abstraction — and it’s arguably beyond visualization. (Still, it’s unusual treat to see the atoms behind those ethereal bits… given our tendency to segregate the two.)
Via Noise for Airports.
Weight of Your Words
Eric MikaAssignment: Use a physics library.
Physics libraries like Box2D tend to use extremely rational language in extremely literal ways (mass, friction, gravity, etc.) — I wanted to build on this language by overloading its meaning and taking it in an absurdist direction. Electrons, in the quantities pushed around by our machines, certainly don’t carry much physical weight… how, then, can we weigh a string of characters?
Google seems to have this sorted out…
just about any conceivable string of text can be quantified, weighed, and perhaps valued by the number of results it dredges up.
So I whipped up an app that literally uses Google’s search result count to determine how game elements behave — with the intention to pressure a player into testing their own judgment of the worth of a word against Google’s. It looks like this:
How does our understanding of how much a word weighs depart from Google’s absolutism? How much weight can you balance?
The game mechanics are pretty basic… Box2D manages the interactions between the words and the tilting ledge below. The ledge is attached to a joint in the middle of the screen, and if words are distributed unevenly it will tilt and send terms sliding into the abyss.
The cloud floating above has a text input box which sends search queries off to Google. A bit of code scrapes the resulting HTML to figure out how many results exist for the query. This runs in its own thread so as not to block the rendering / physics work. After the query count comes back from google, the term you entered drops from the cloud onto the ledge. (You can influence where it will land by positioning the cloud with the mouse beforehand.) The more results a term has, the higher its density — this means that major search terms will help you load extra weight on the ledge, but their extra mass also means they’re more likely to tilt the ledge past the point of recovery. This, I hope, forces the player to estimate the weight of a term before they drop it from the cloud.
Here are a few more screenshots from development and testing:
The game doesn’t work very well as an Applet (it uses the net library, which requires code signing), so it’s probably easiest to download the zip below if you’d like to give it a try.
The source is a bit long to embed here, so I’ve attached it below.
