To get acquainted with prototyping with 2” blue insulating foam, I decided to build a large-scale model of a classic phone-booth telephone handset.
The process was relatively simple.
Each step is documented below.
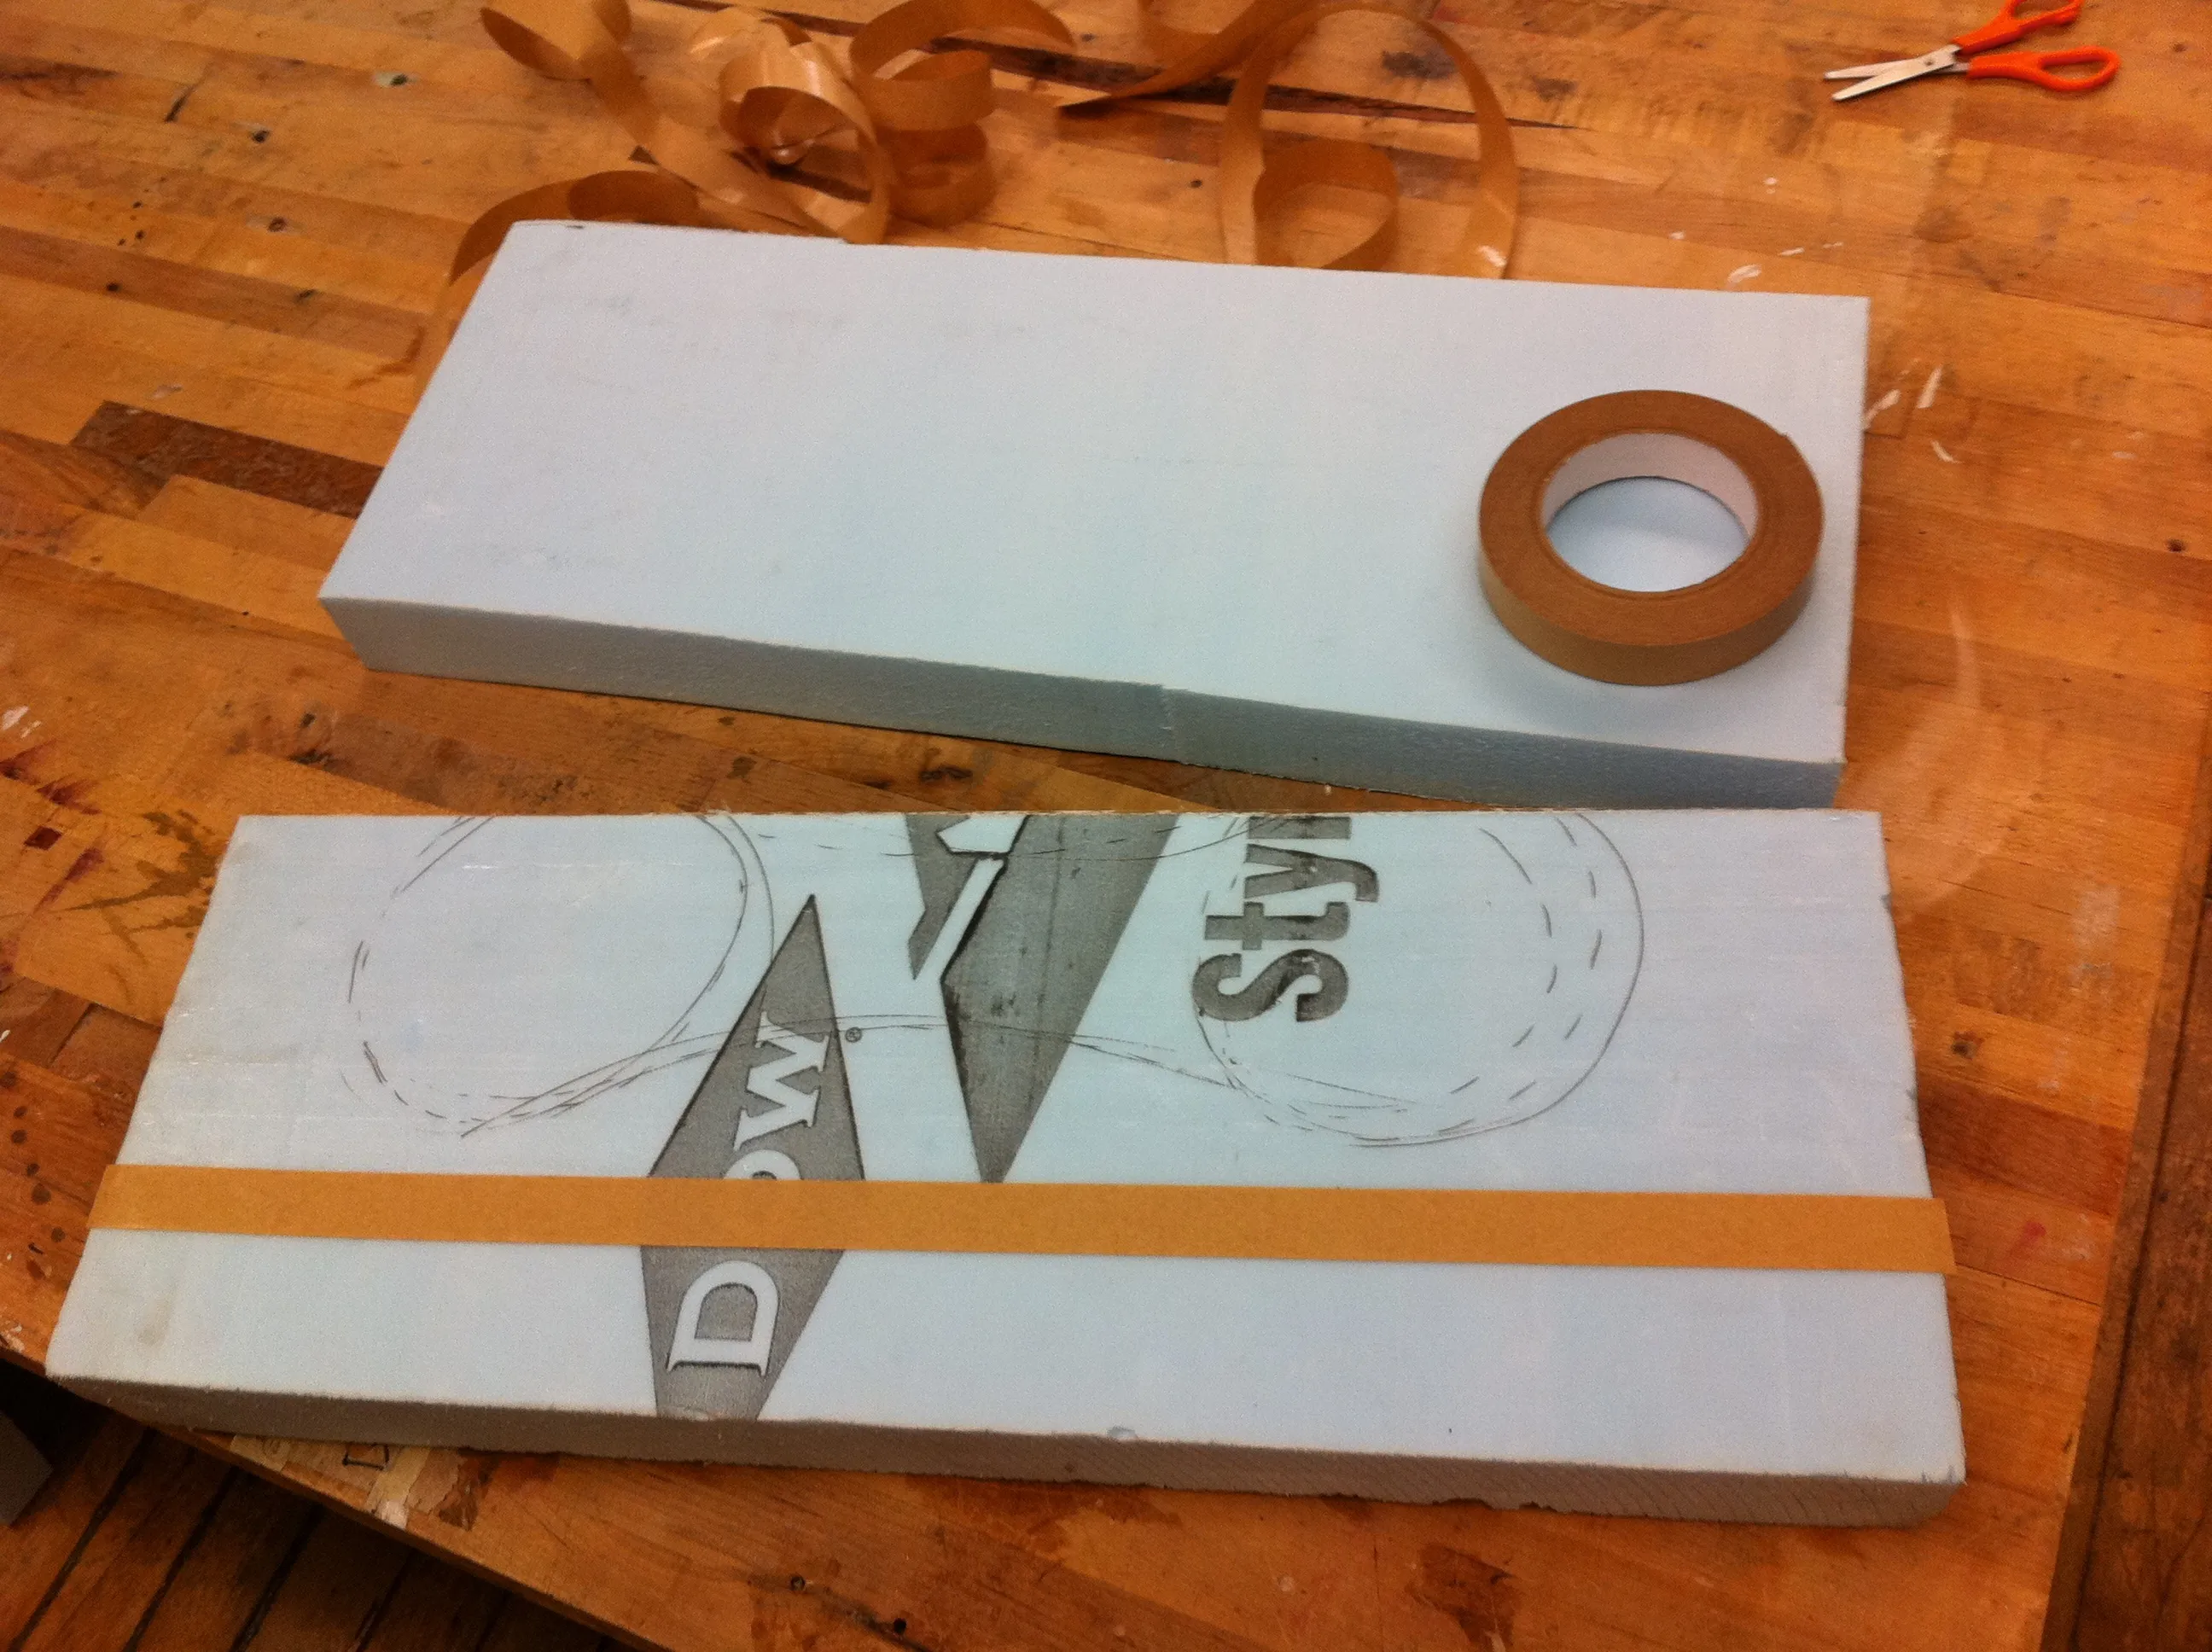
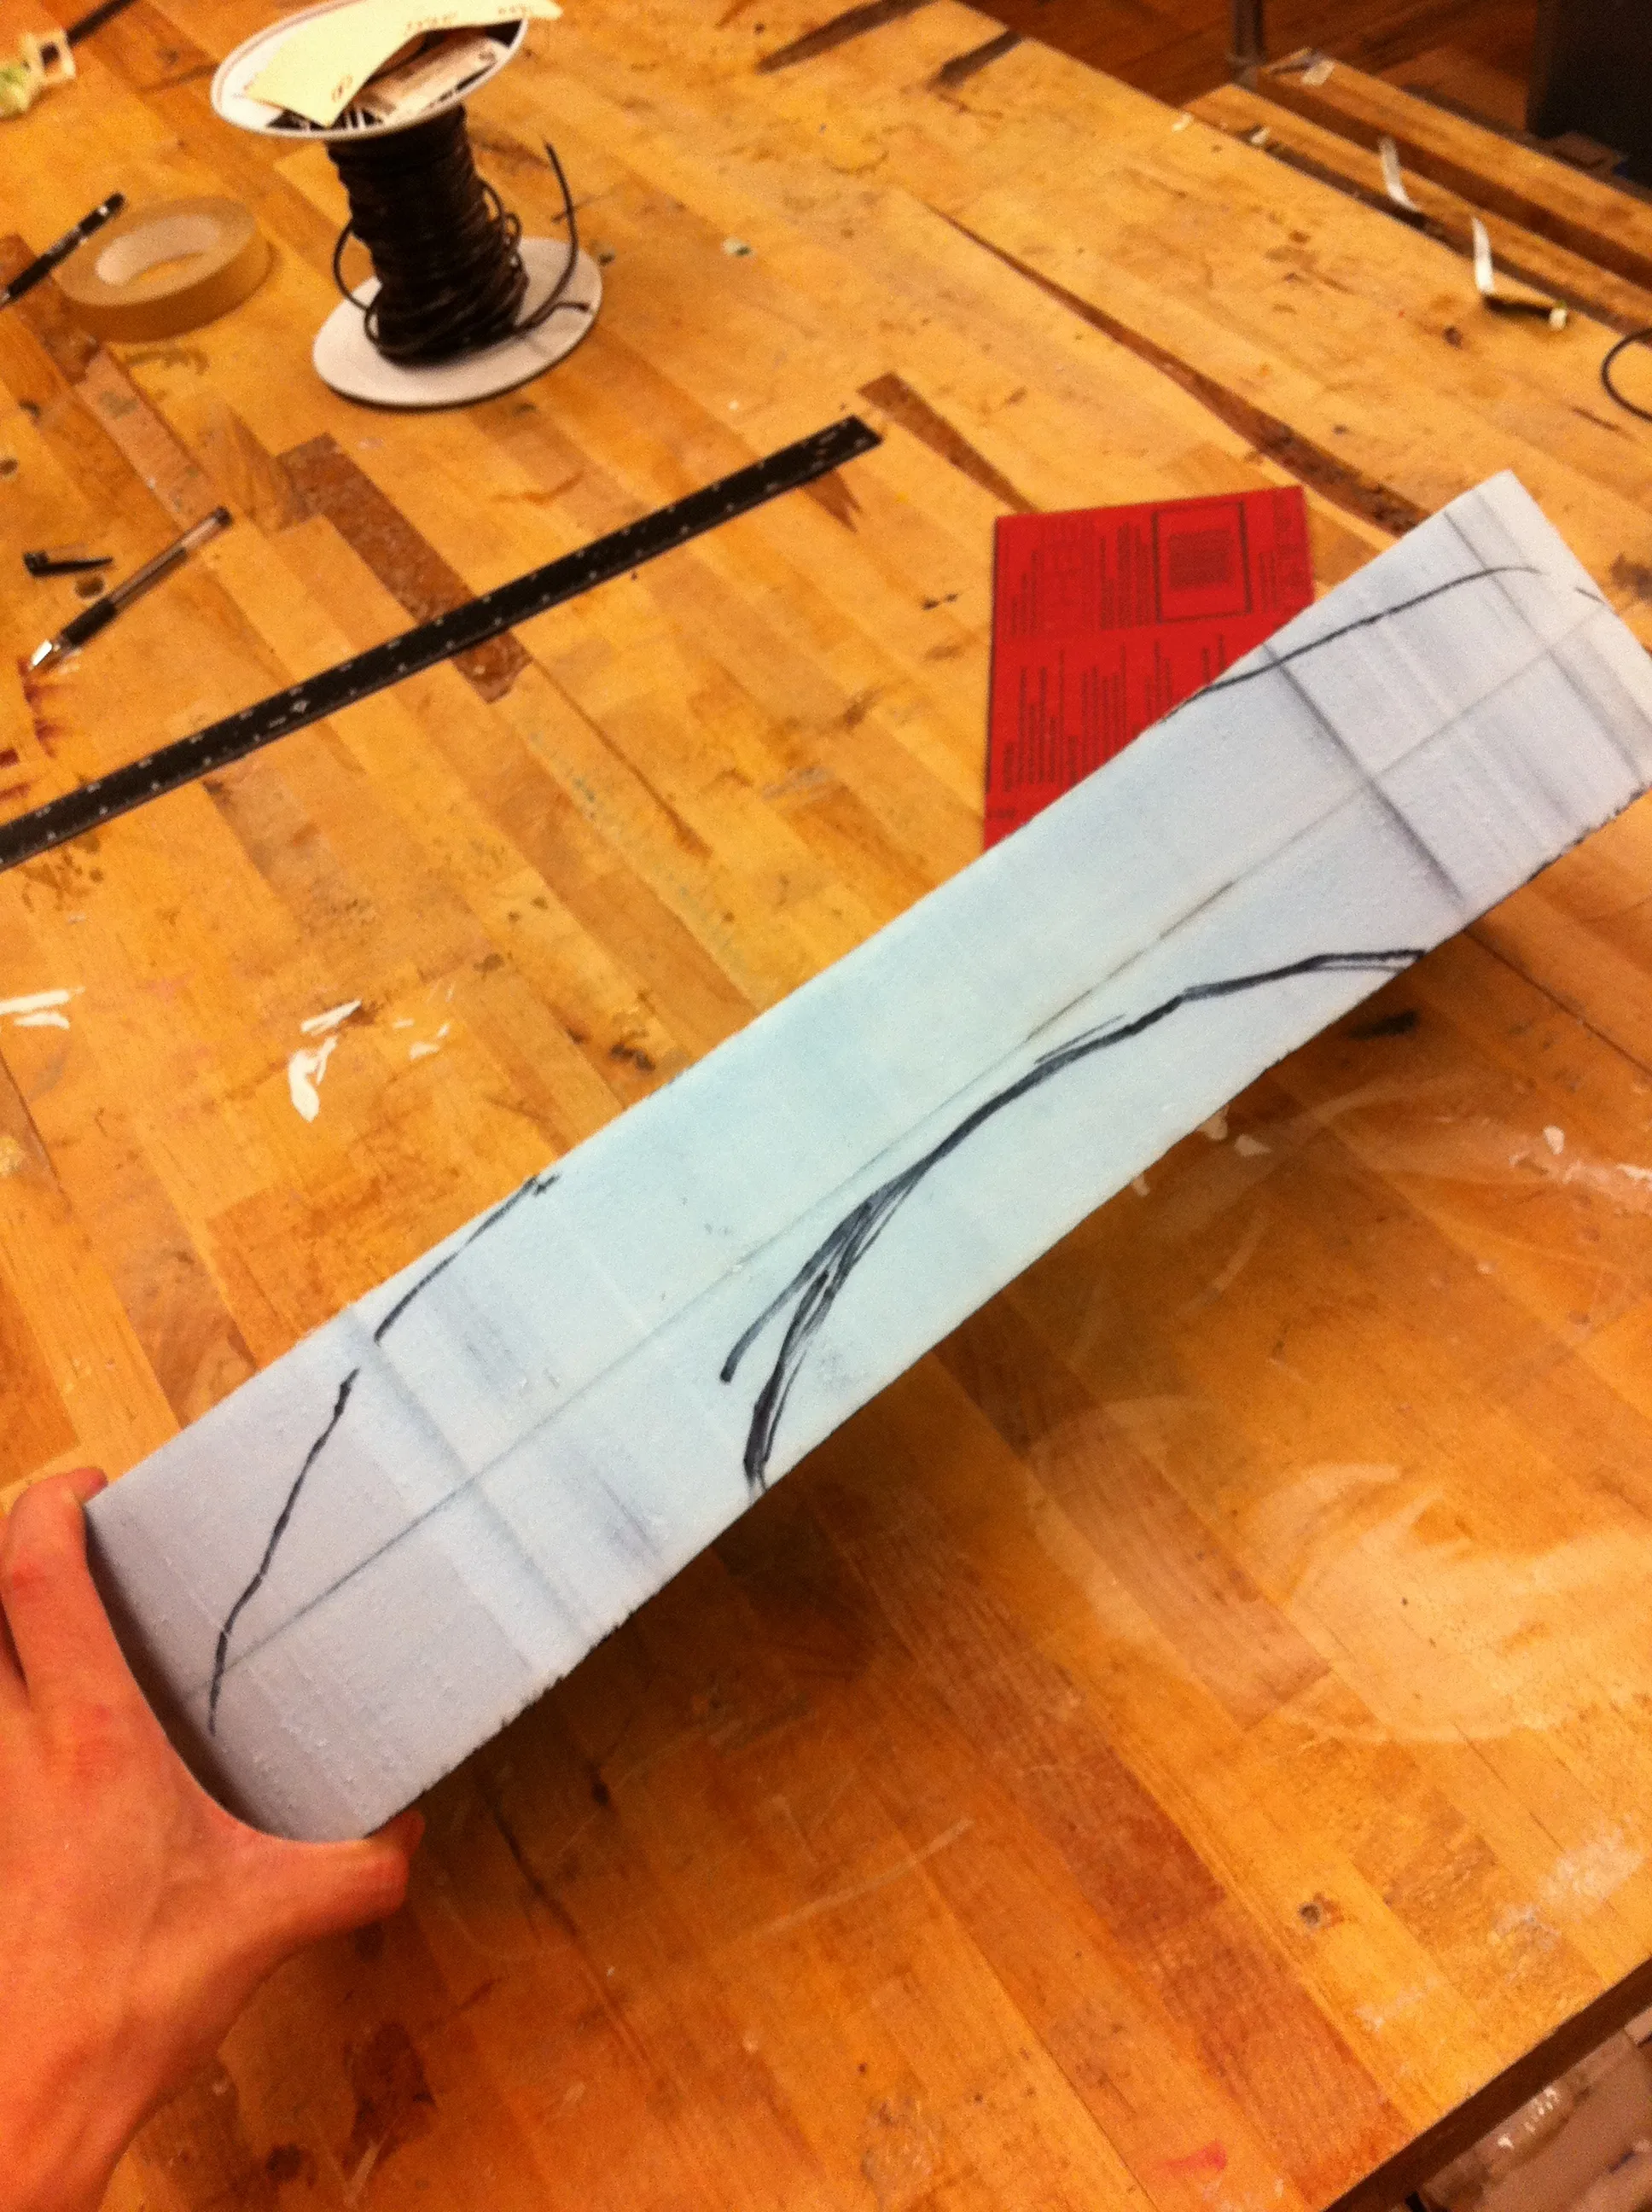
First, I cut two pieces of 2” thick foam down to the approximate size of the handset, and then joined the pieces using transfer tape.
Next, I sketched the basic outline of a two-dimensional version of the phone, and did a rough cut on the band saw.
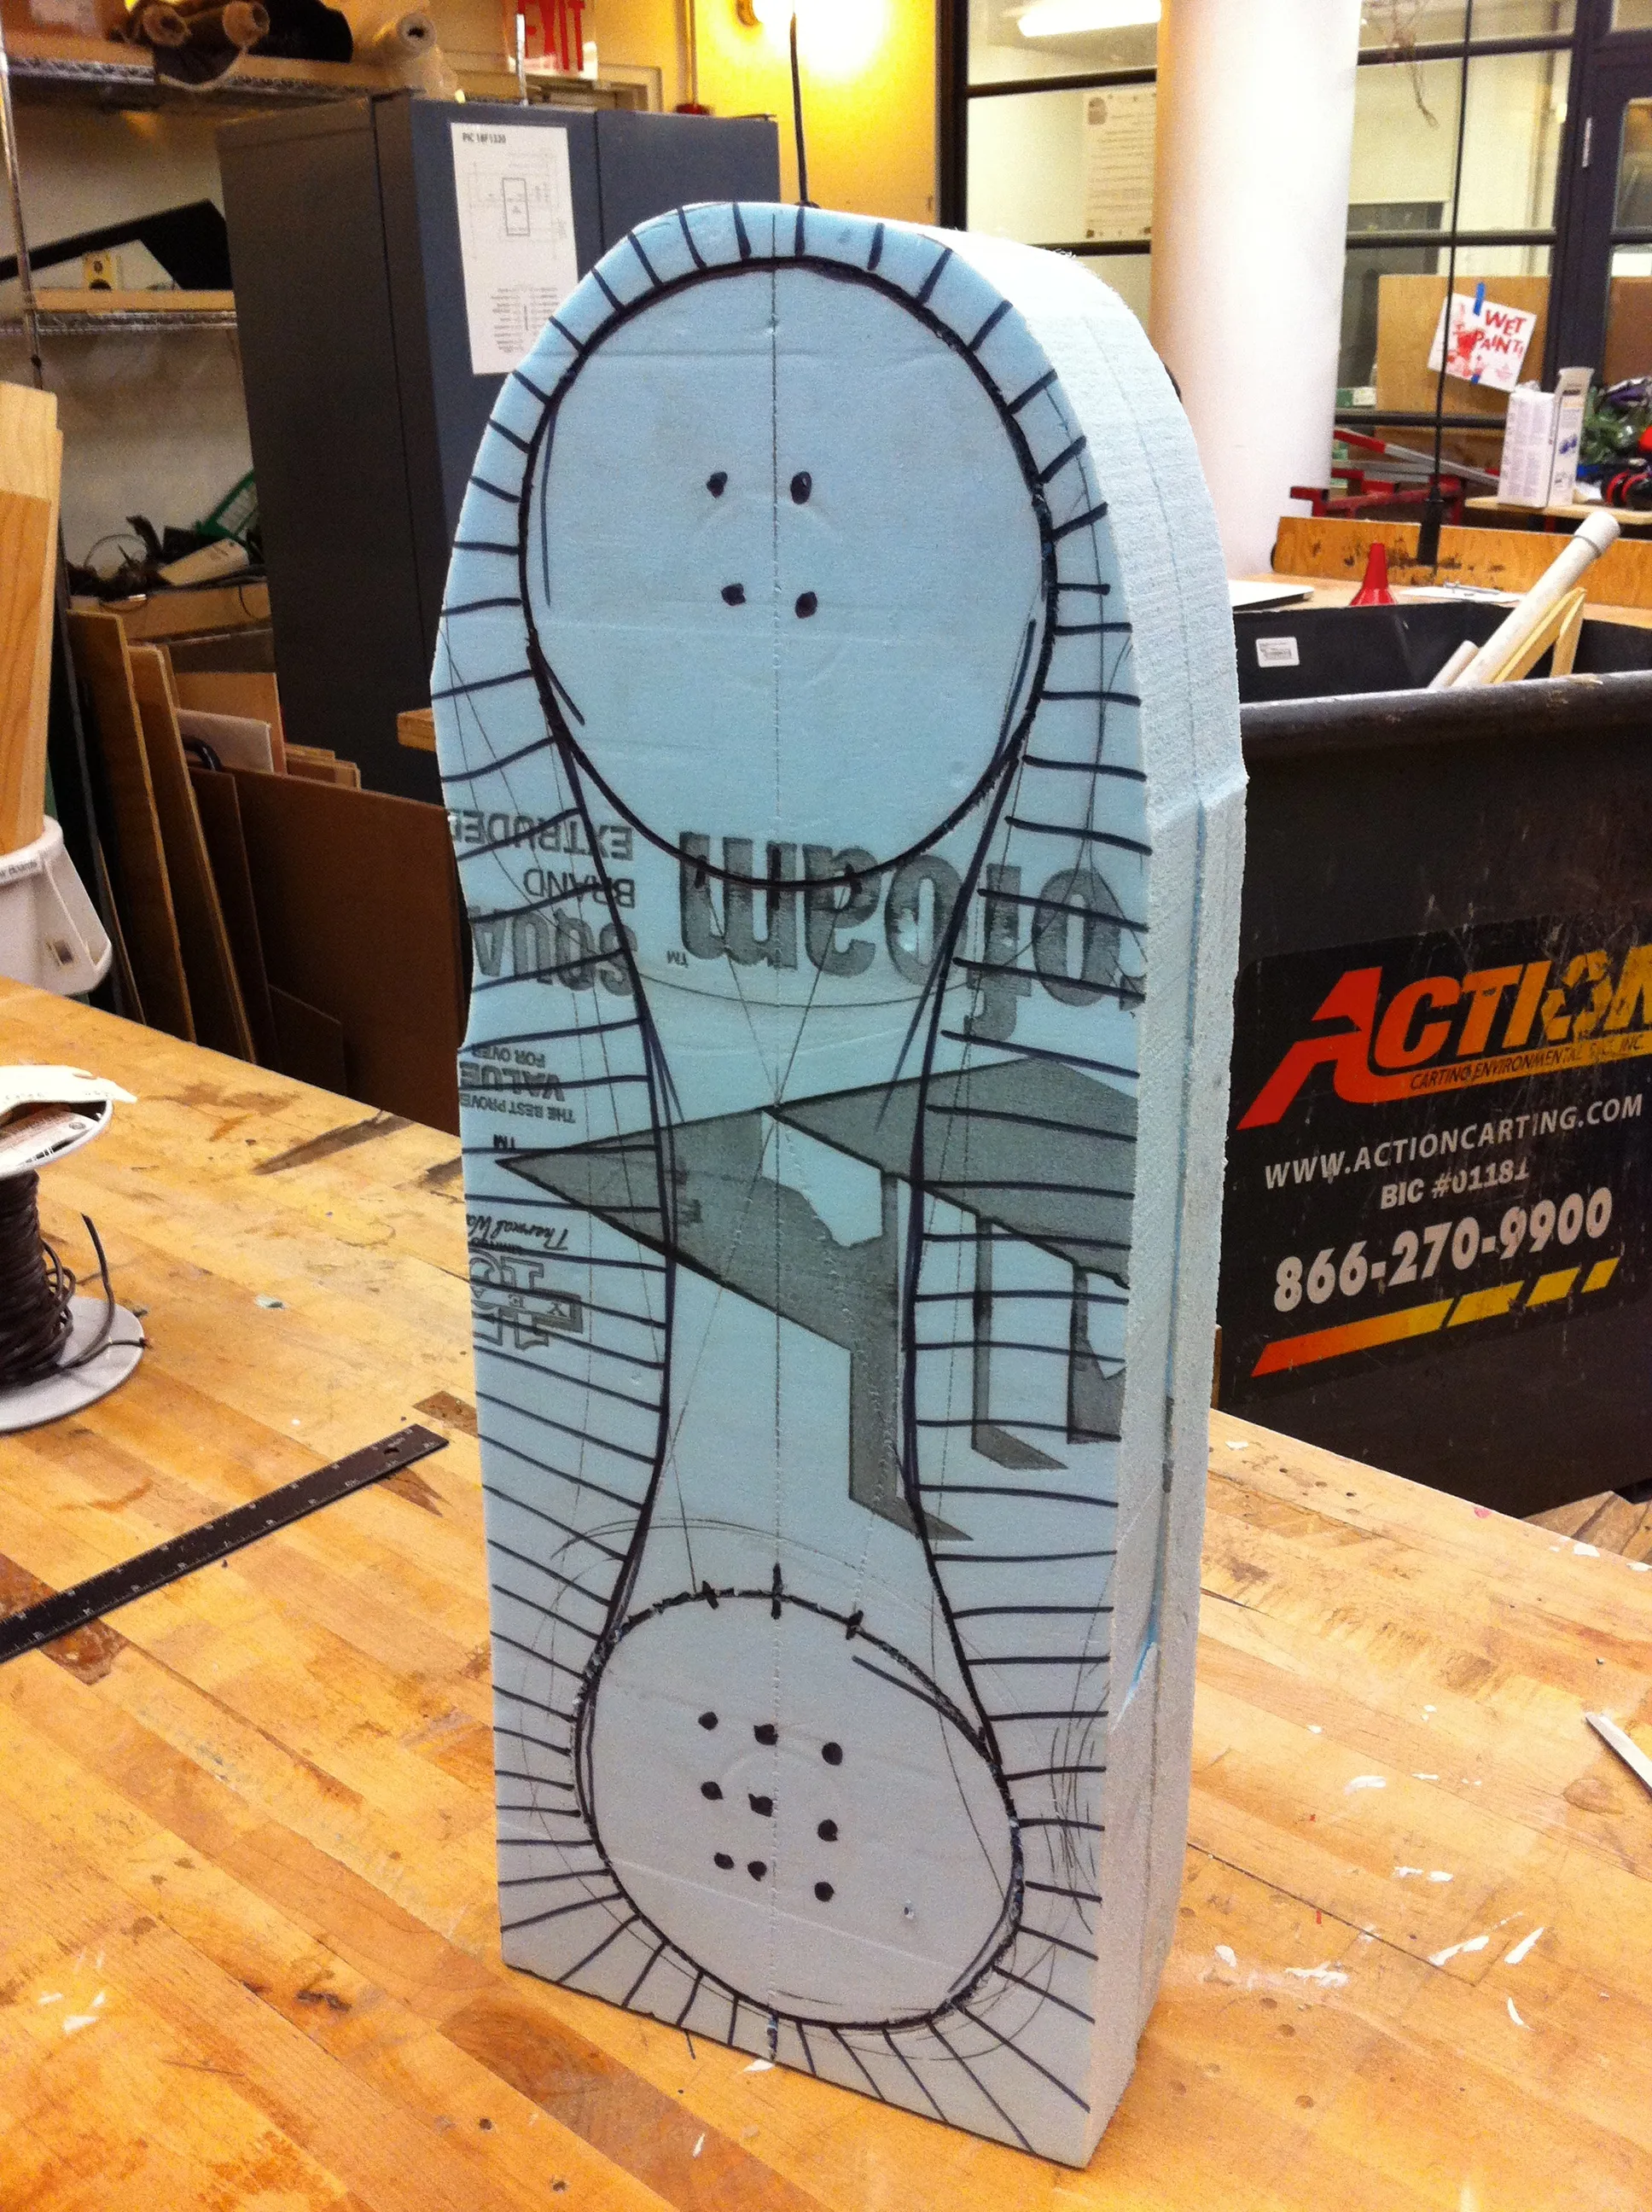
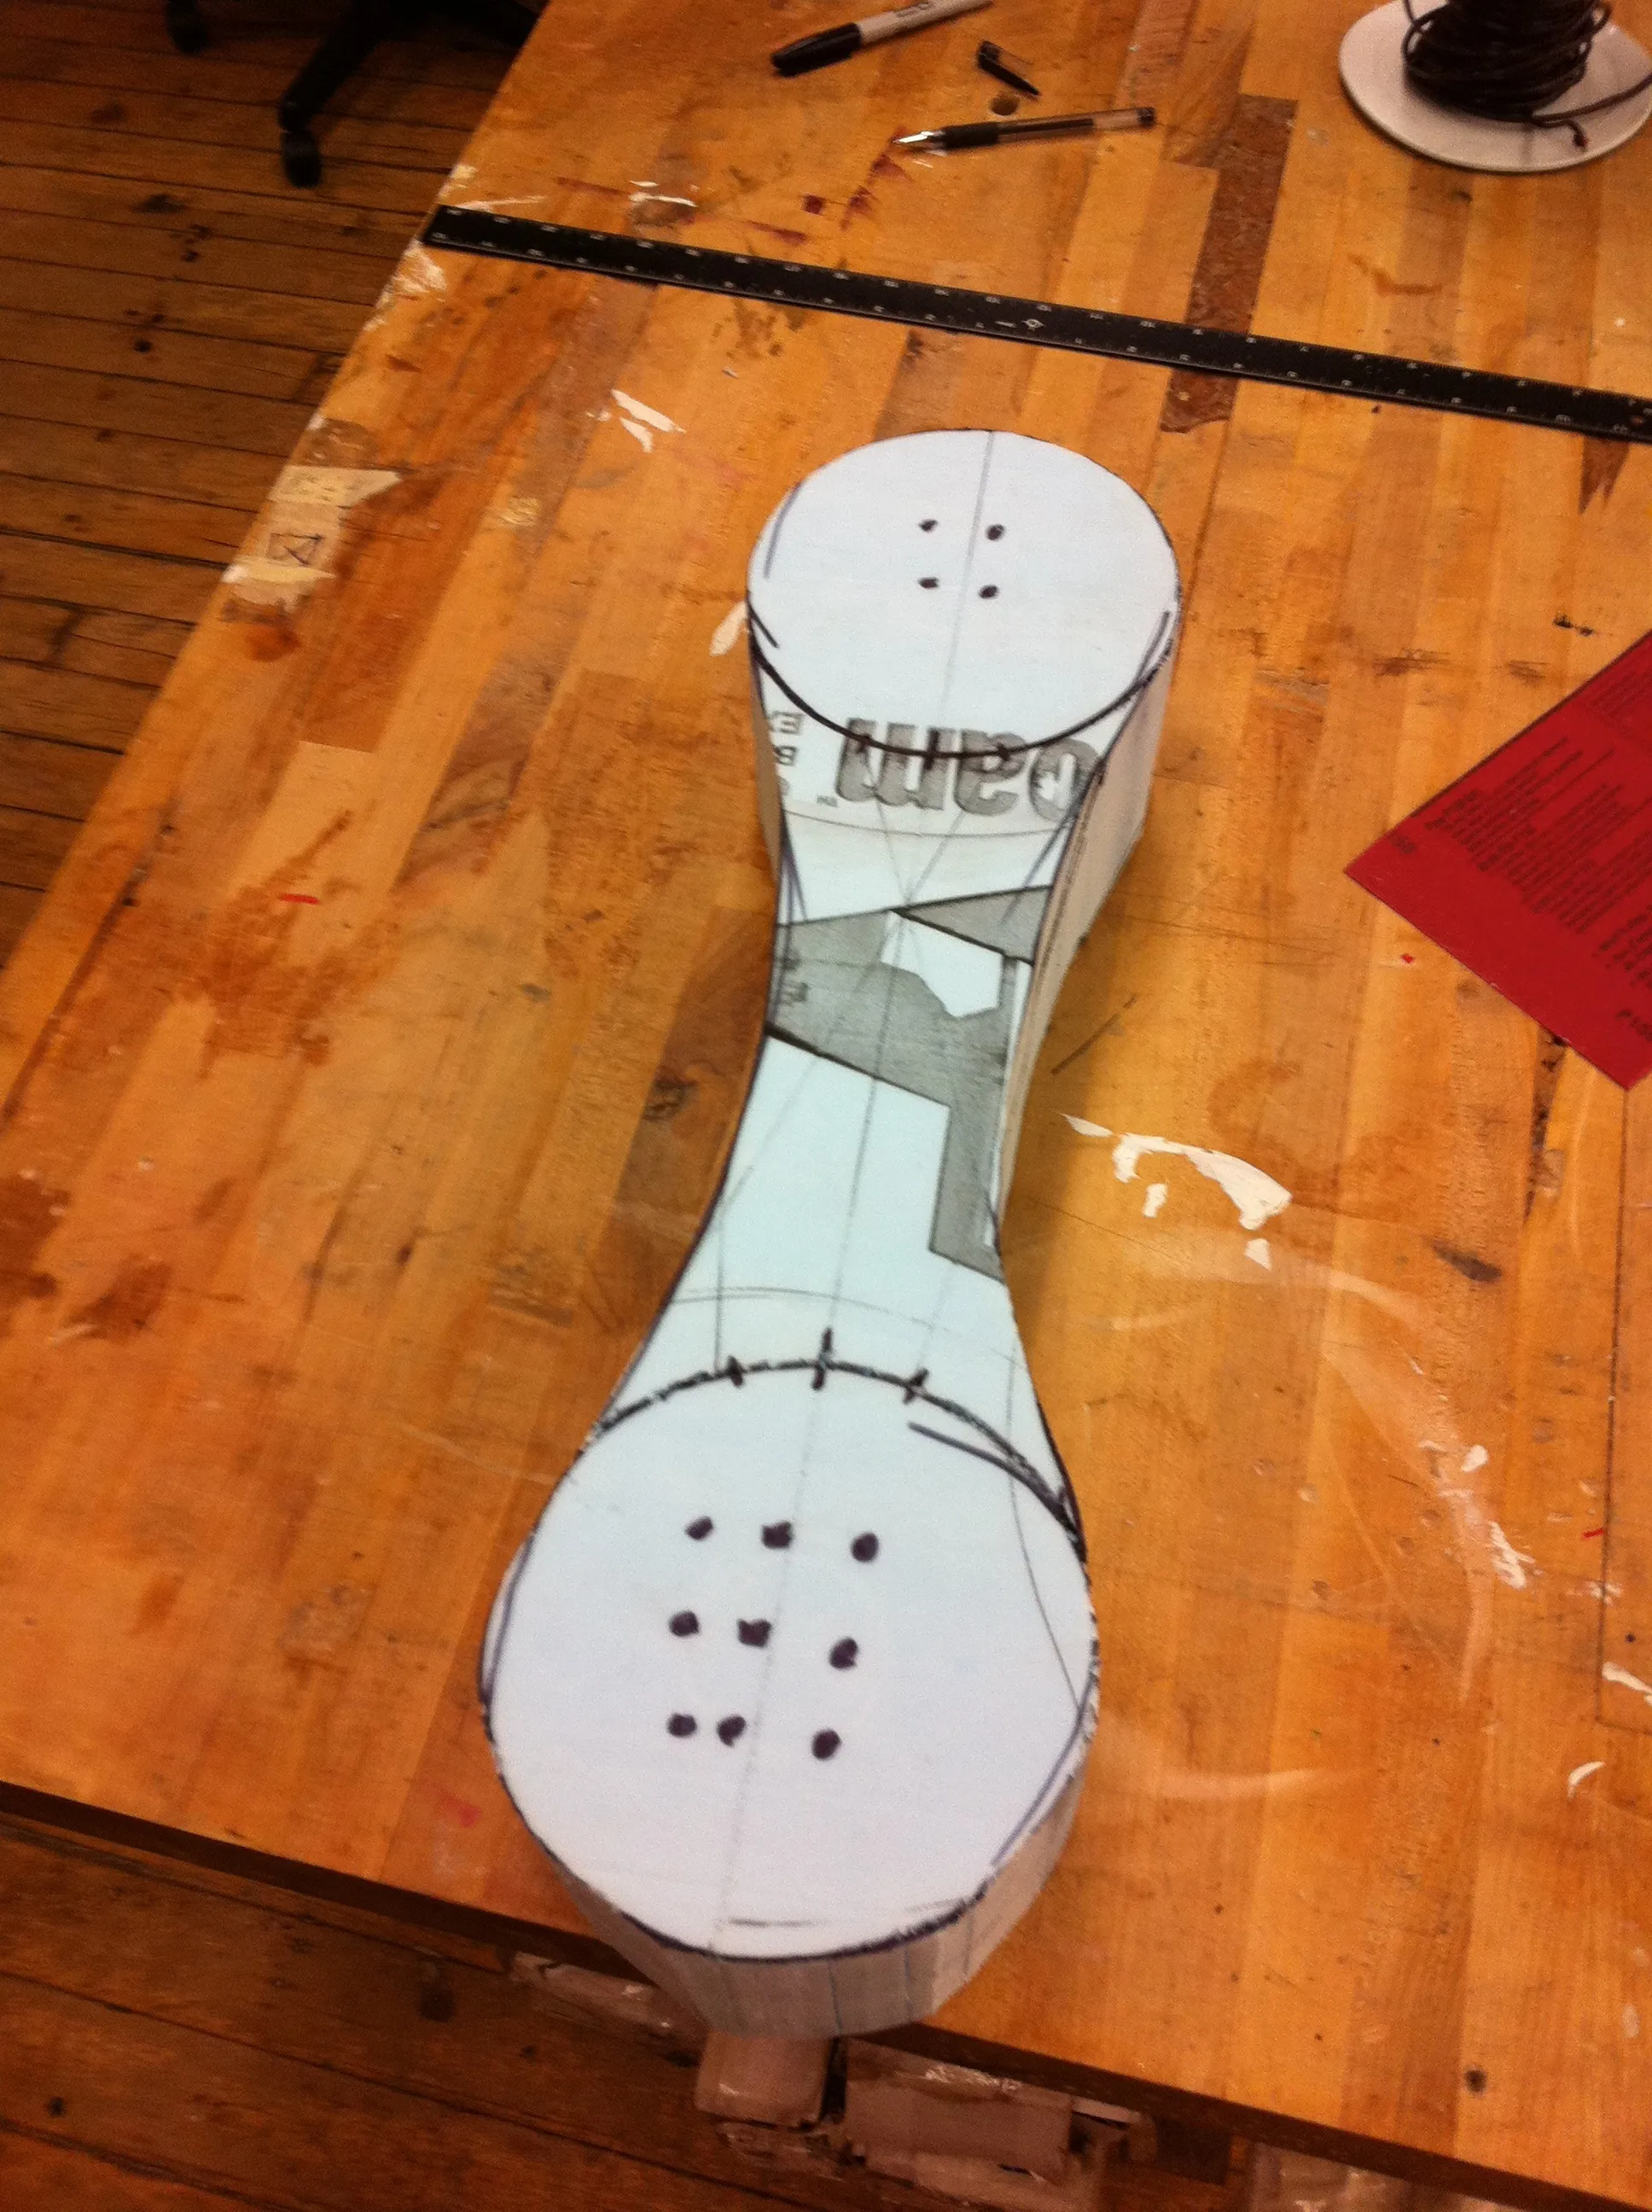
With a basic two-dimensional version of the phone in hand, I sketched out the third dimension and made the corresponding cuts on the band saw.
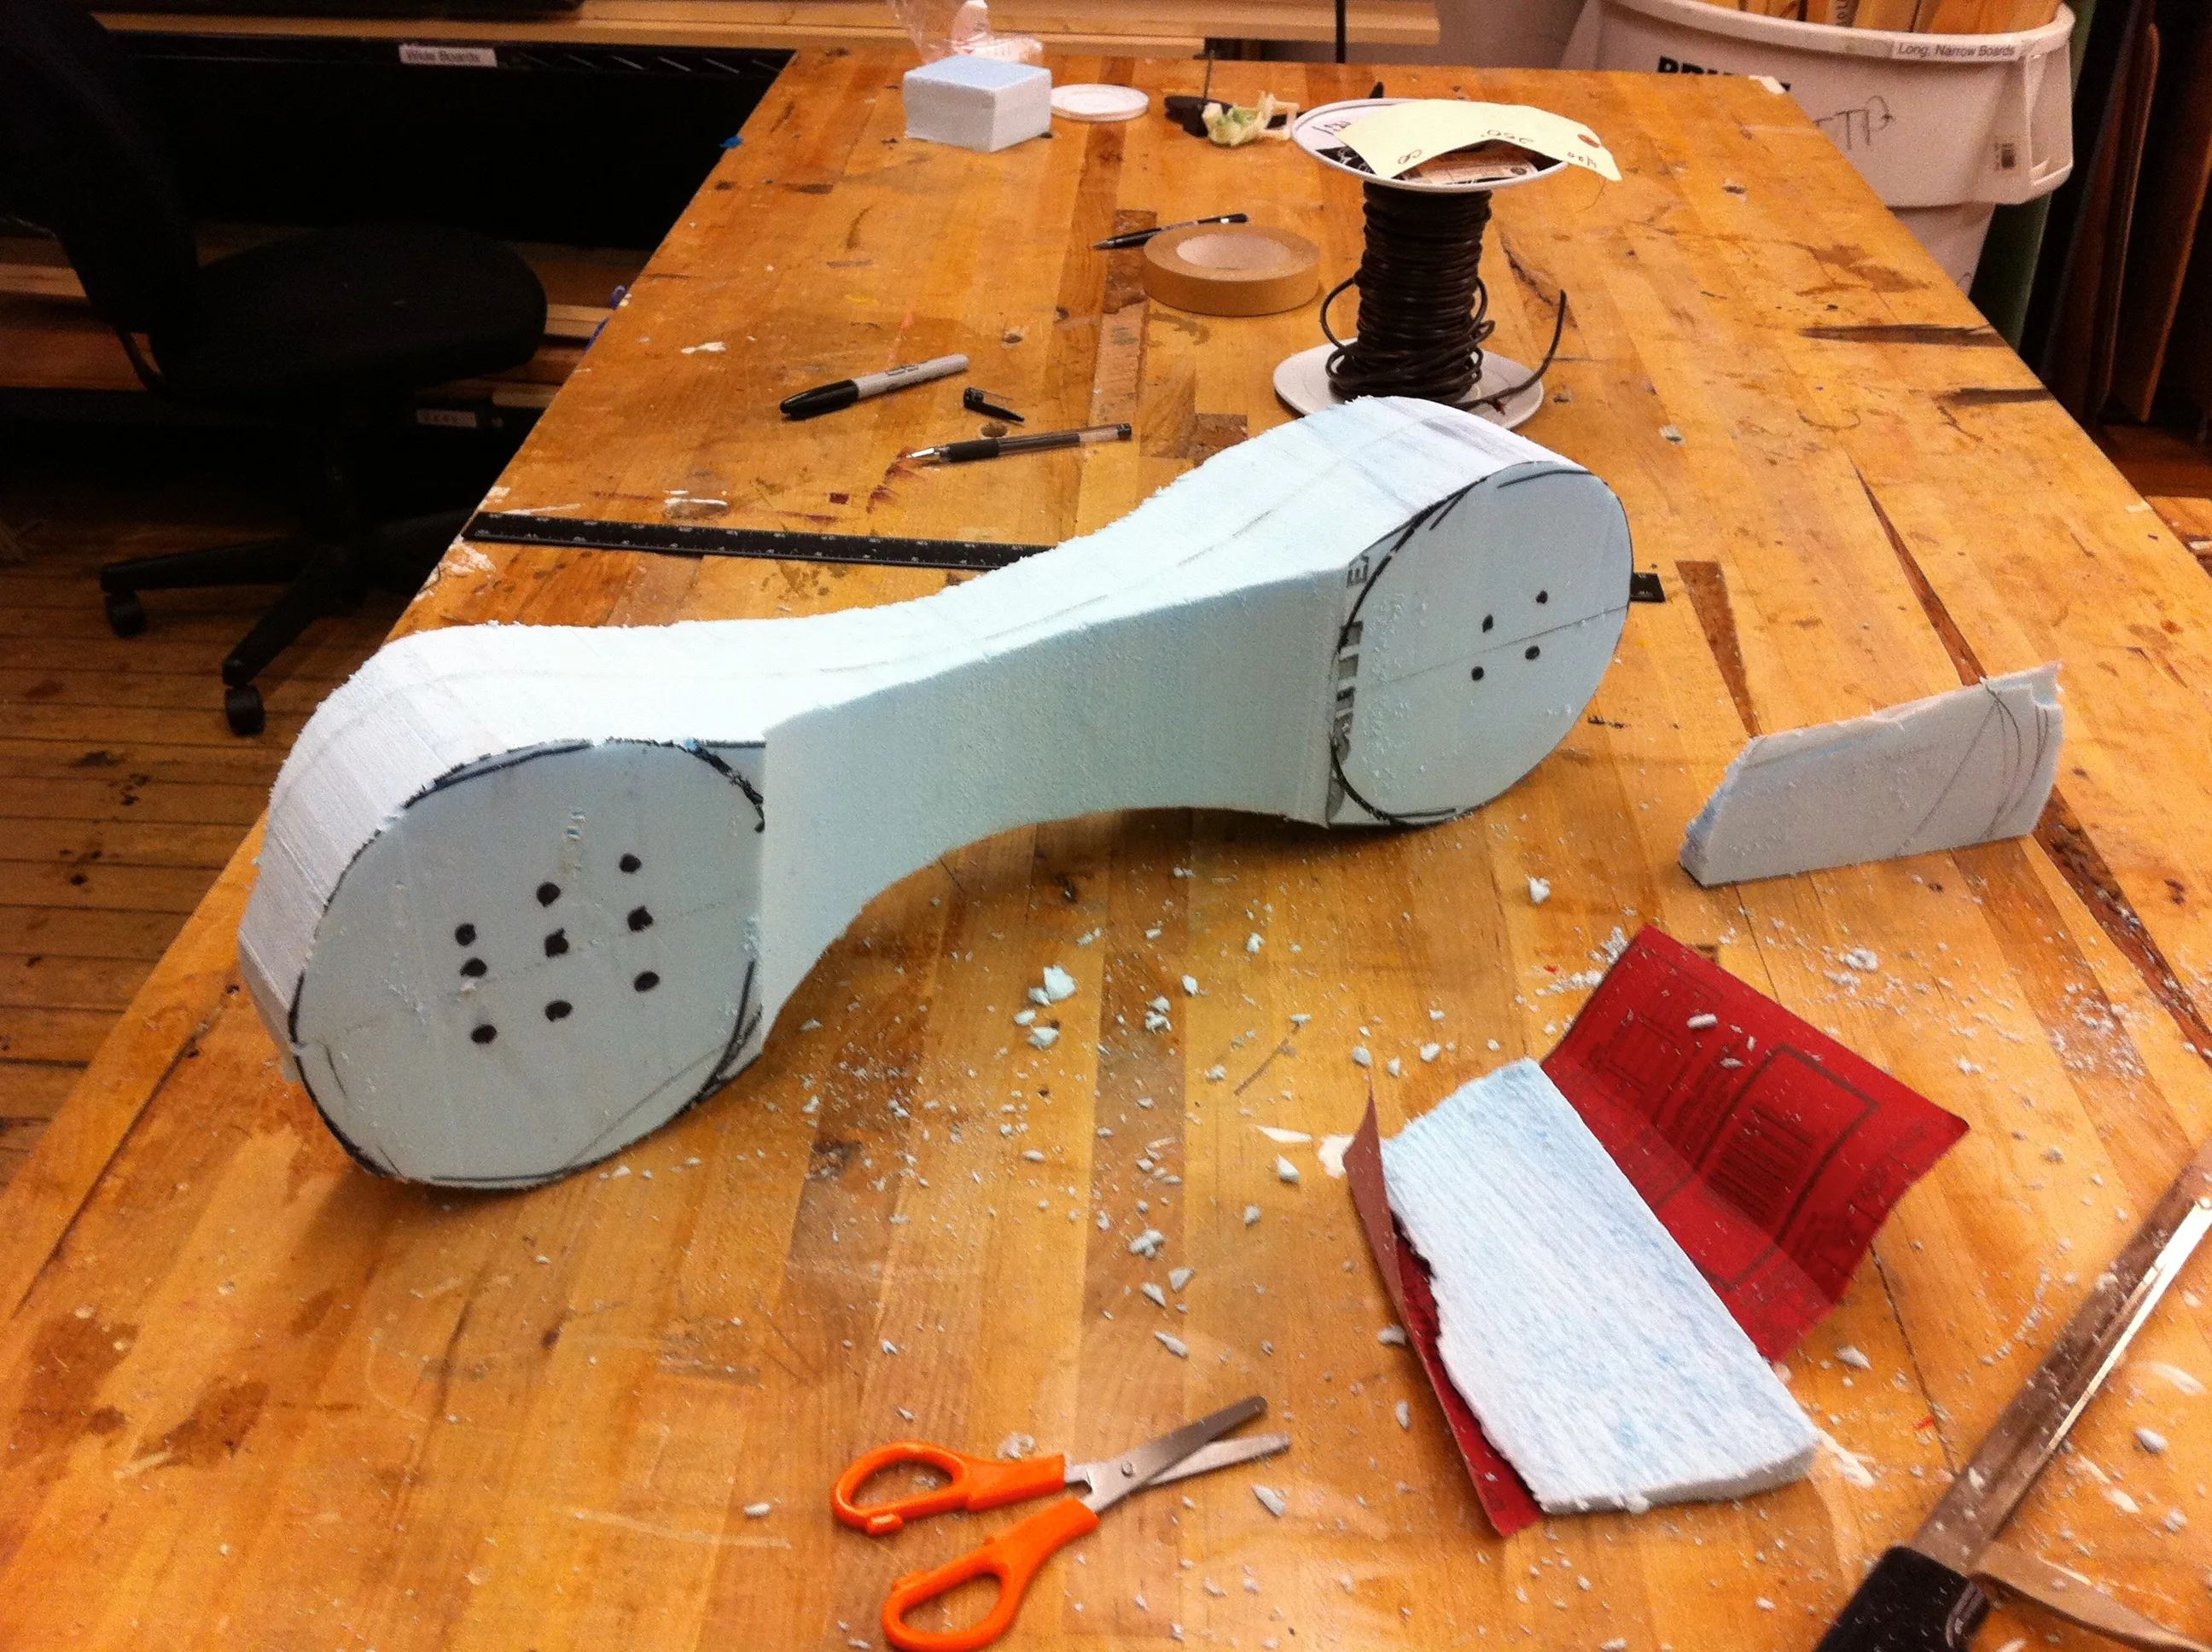
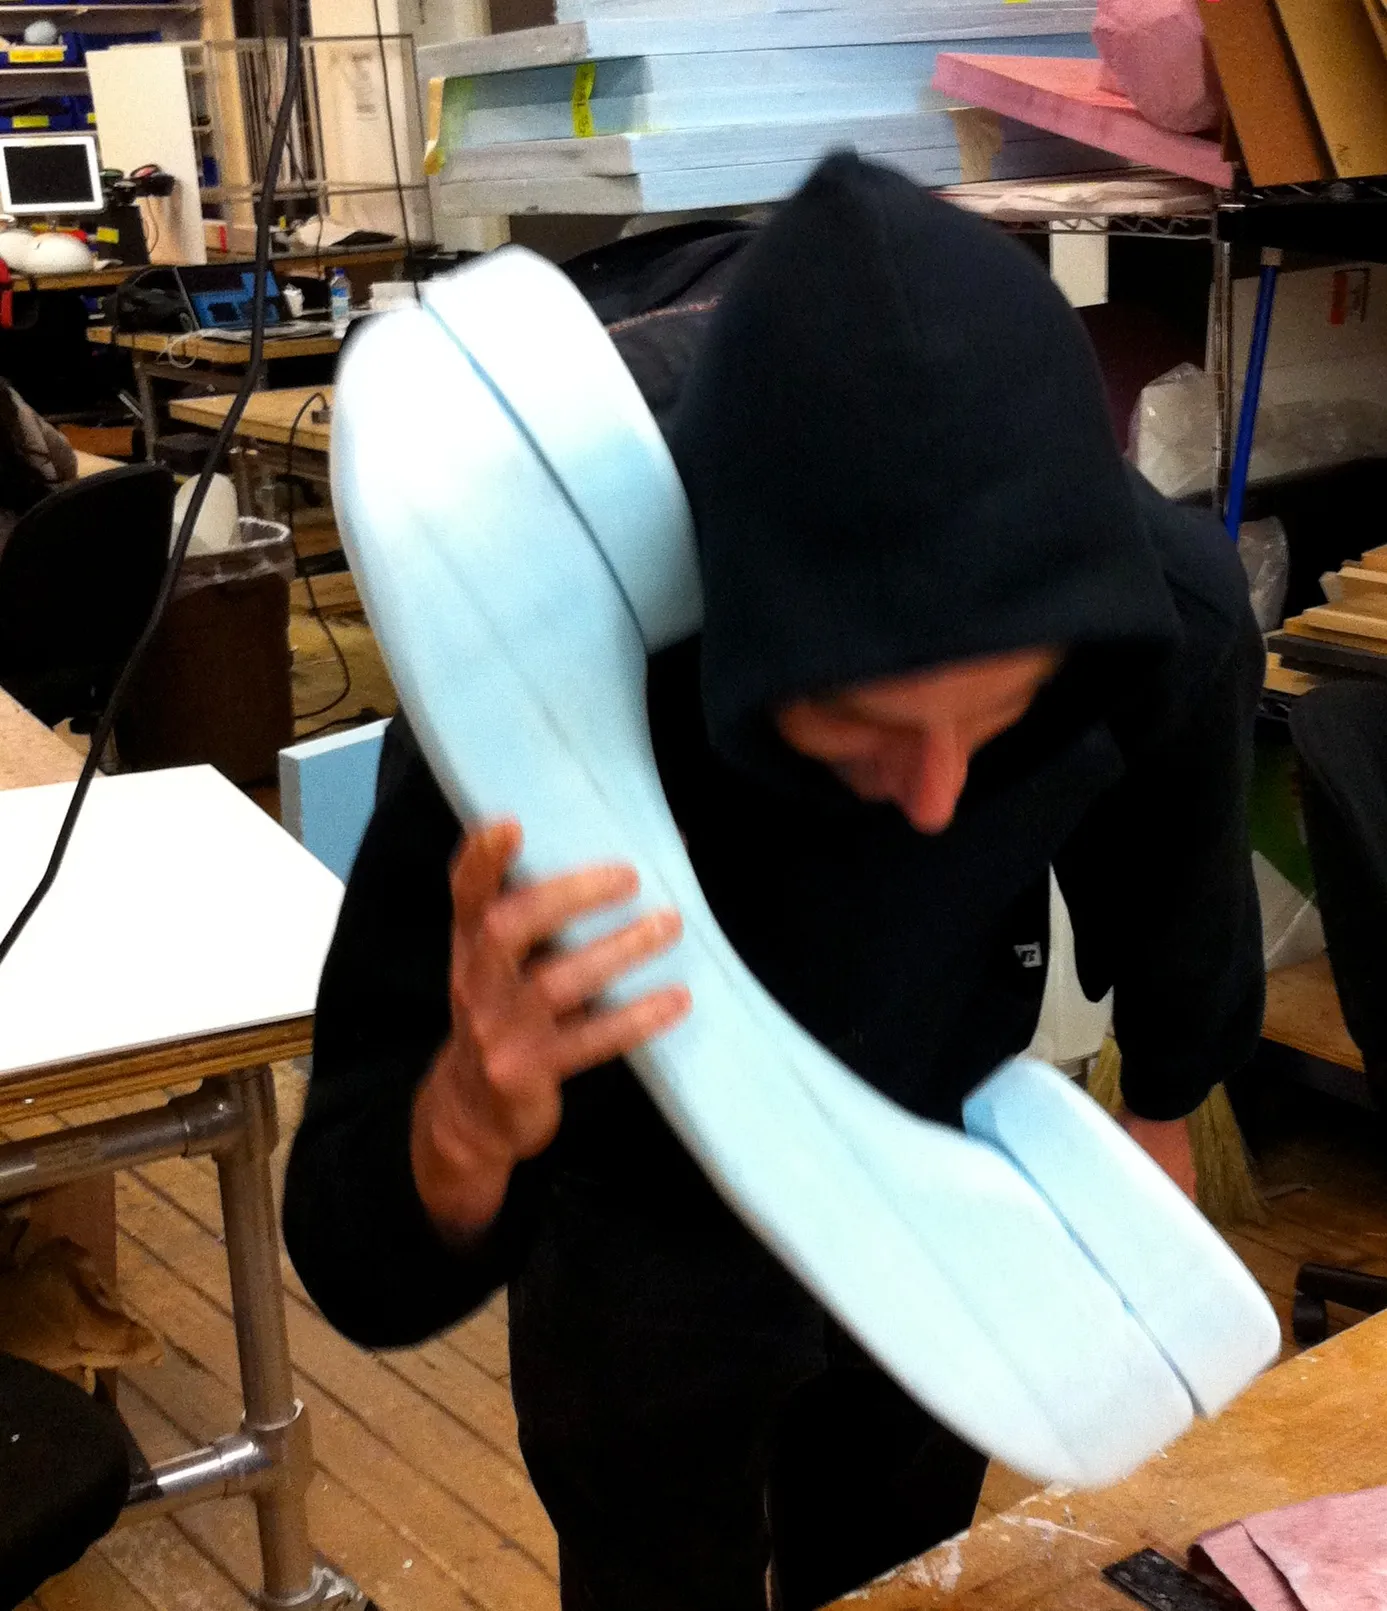
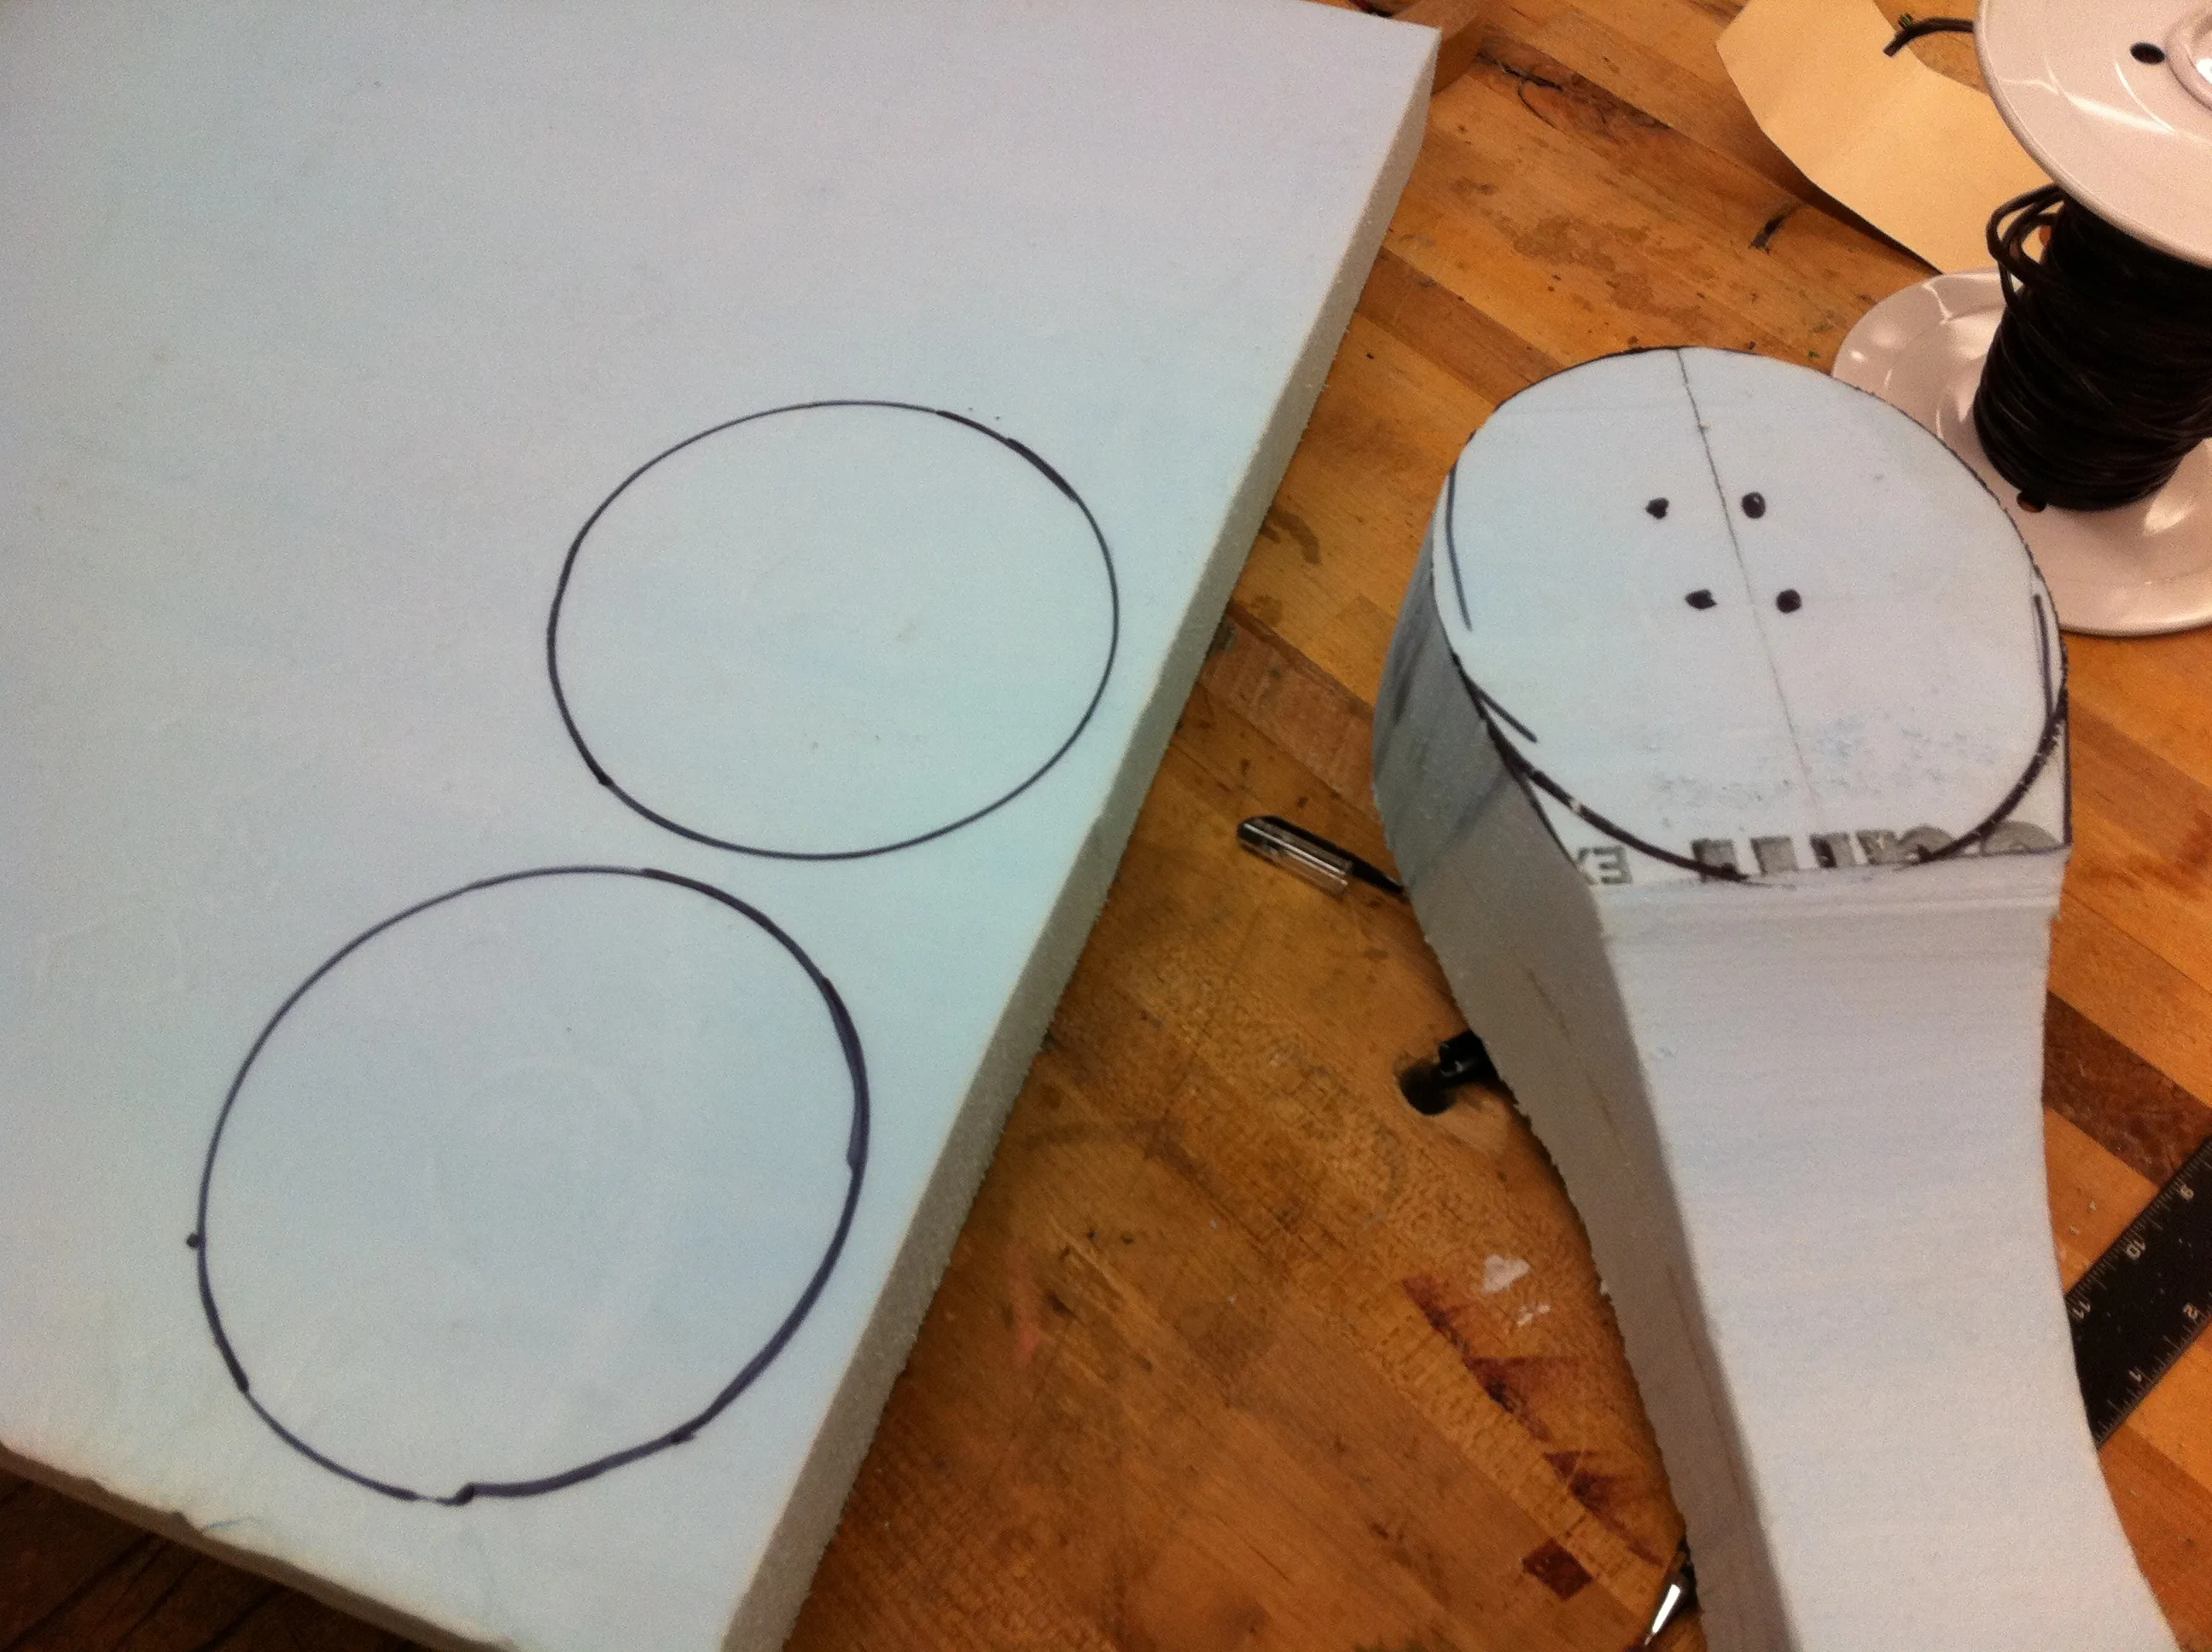
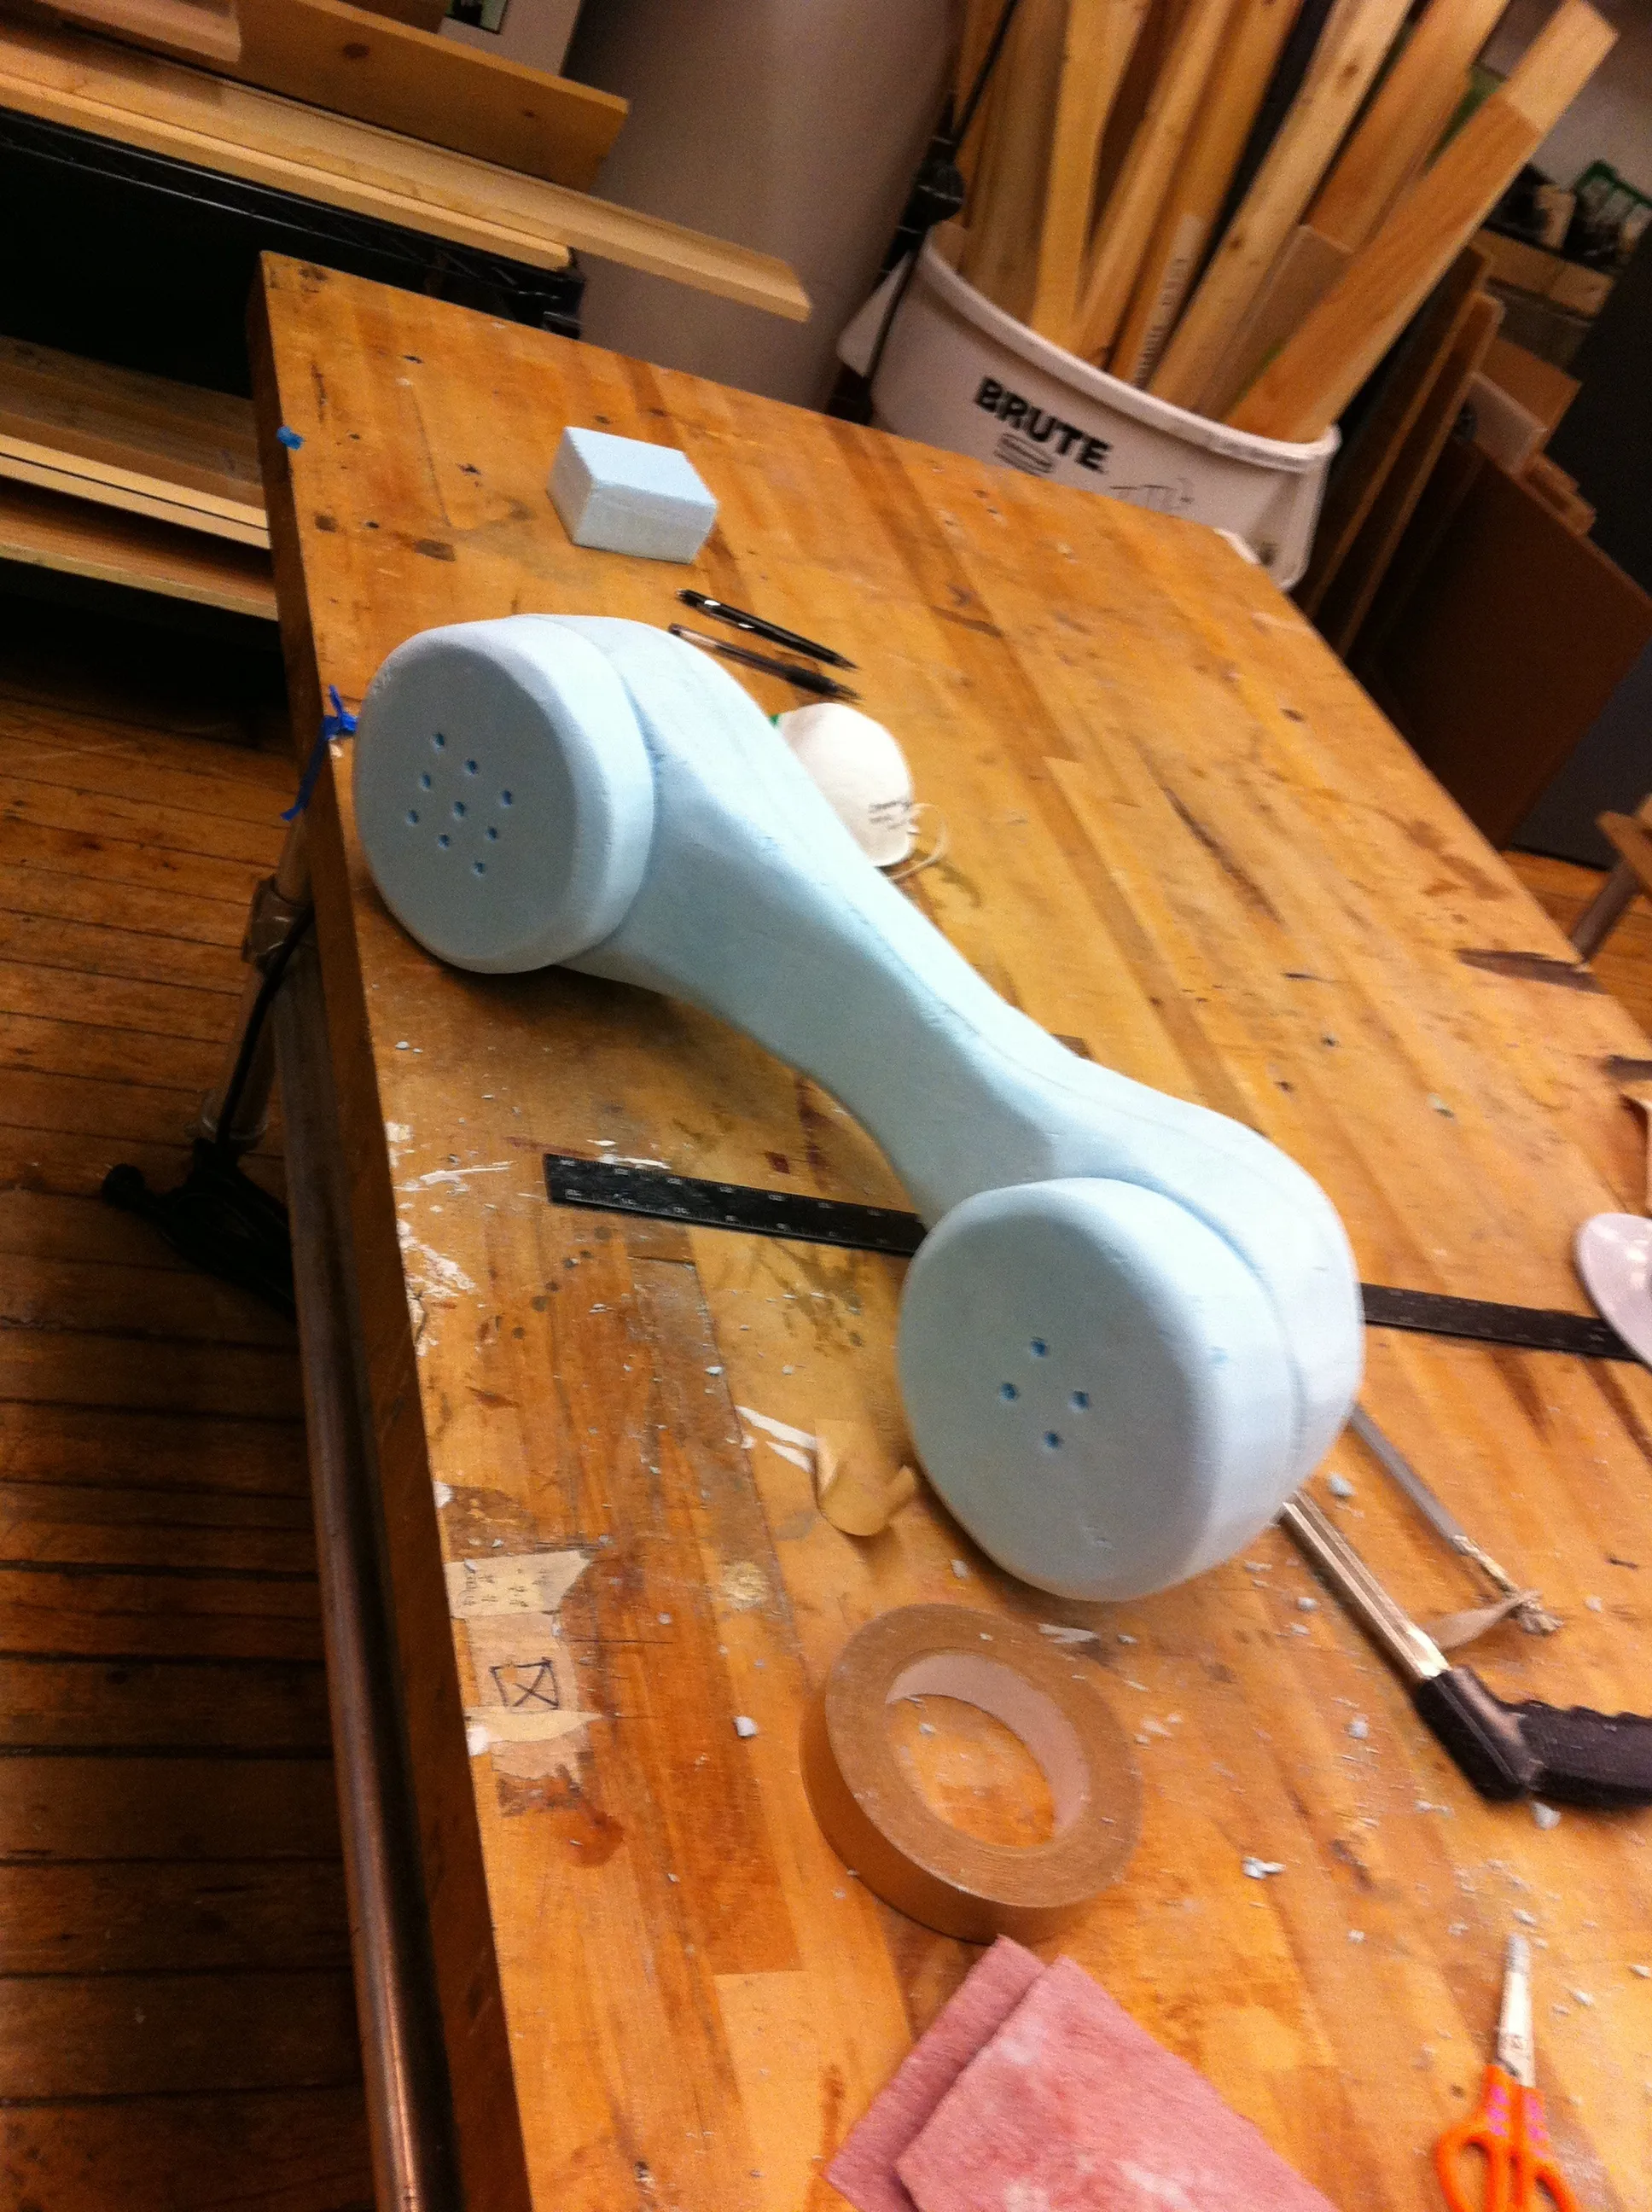
And finally, the ear and microphone cups were sketched and cut. I removed a wedge of foam from each disk on the belt sander to make sure they would mate to the handset at a slight angle. A drill press took care of the holes in each disk.
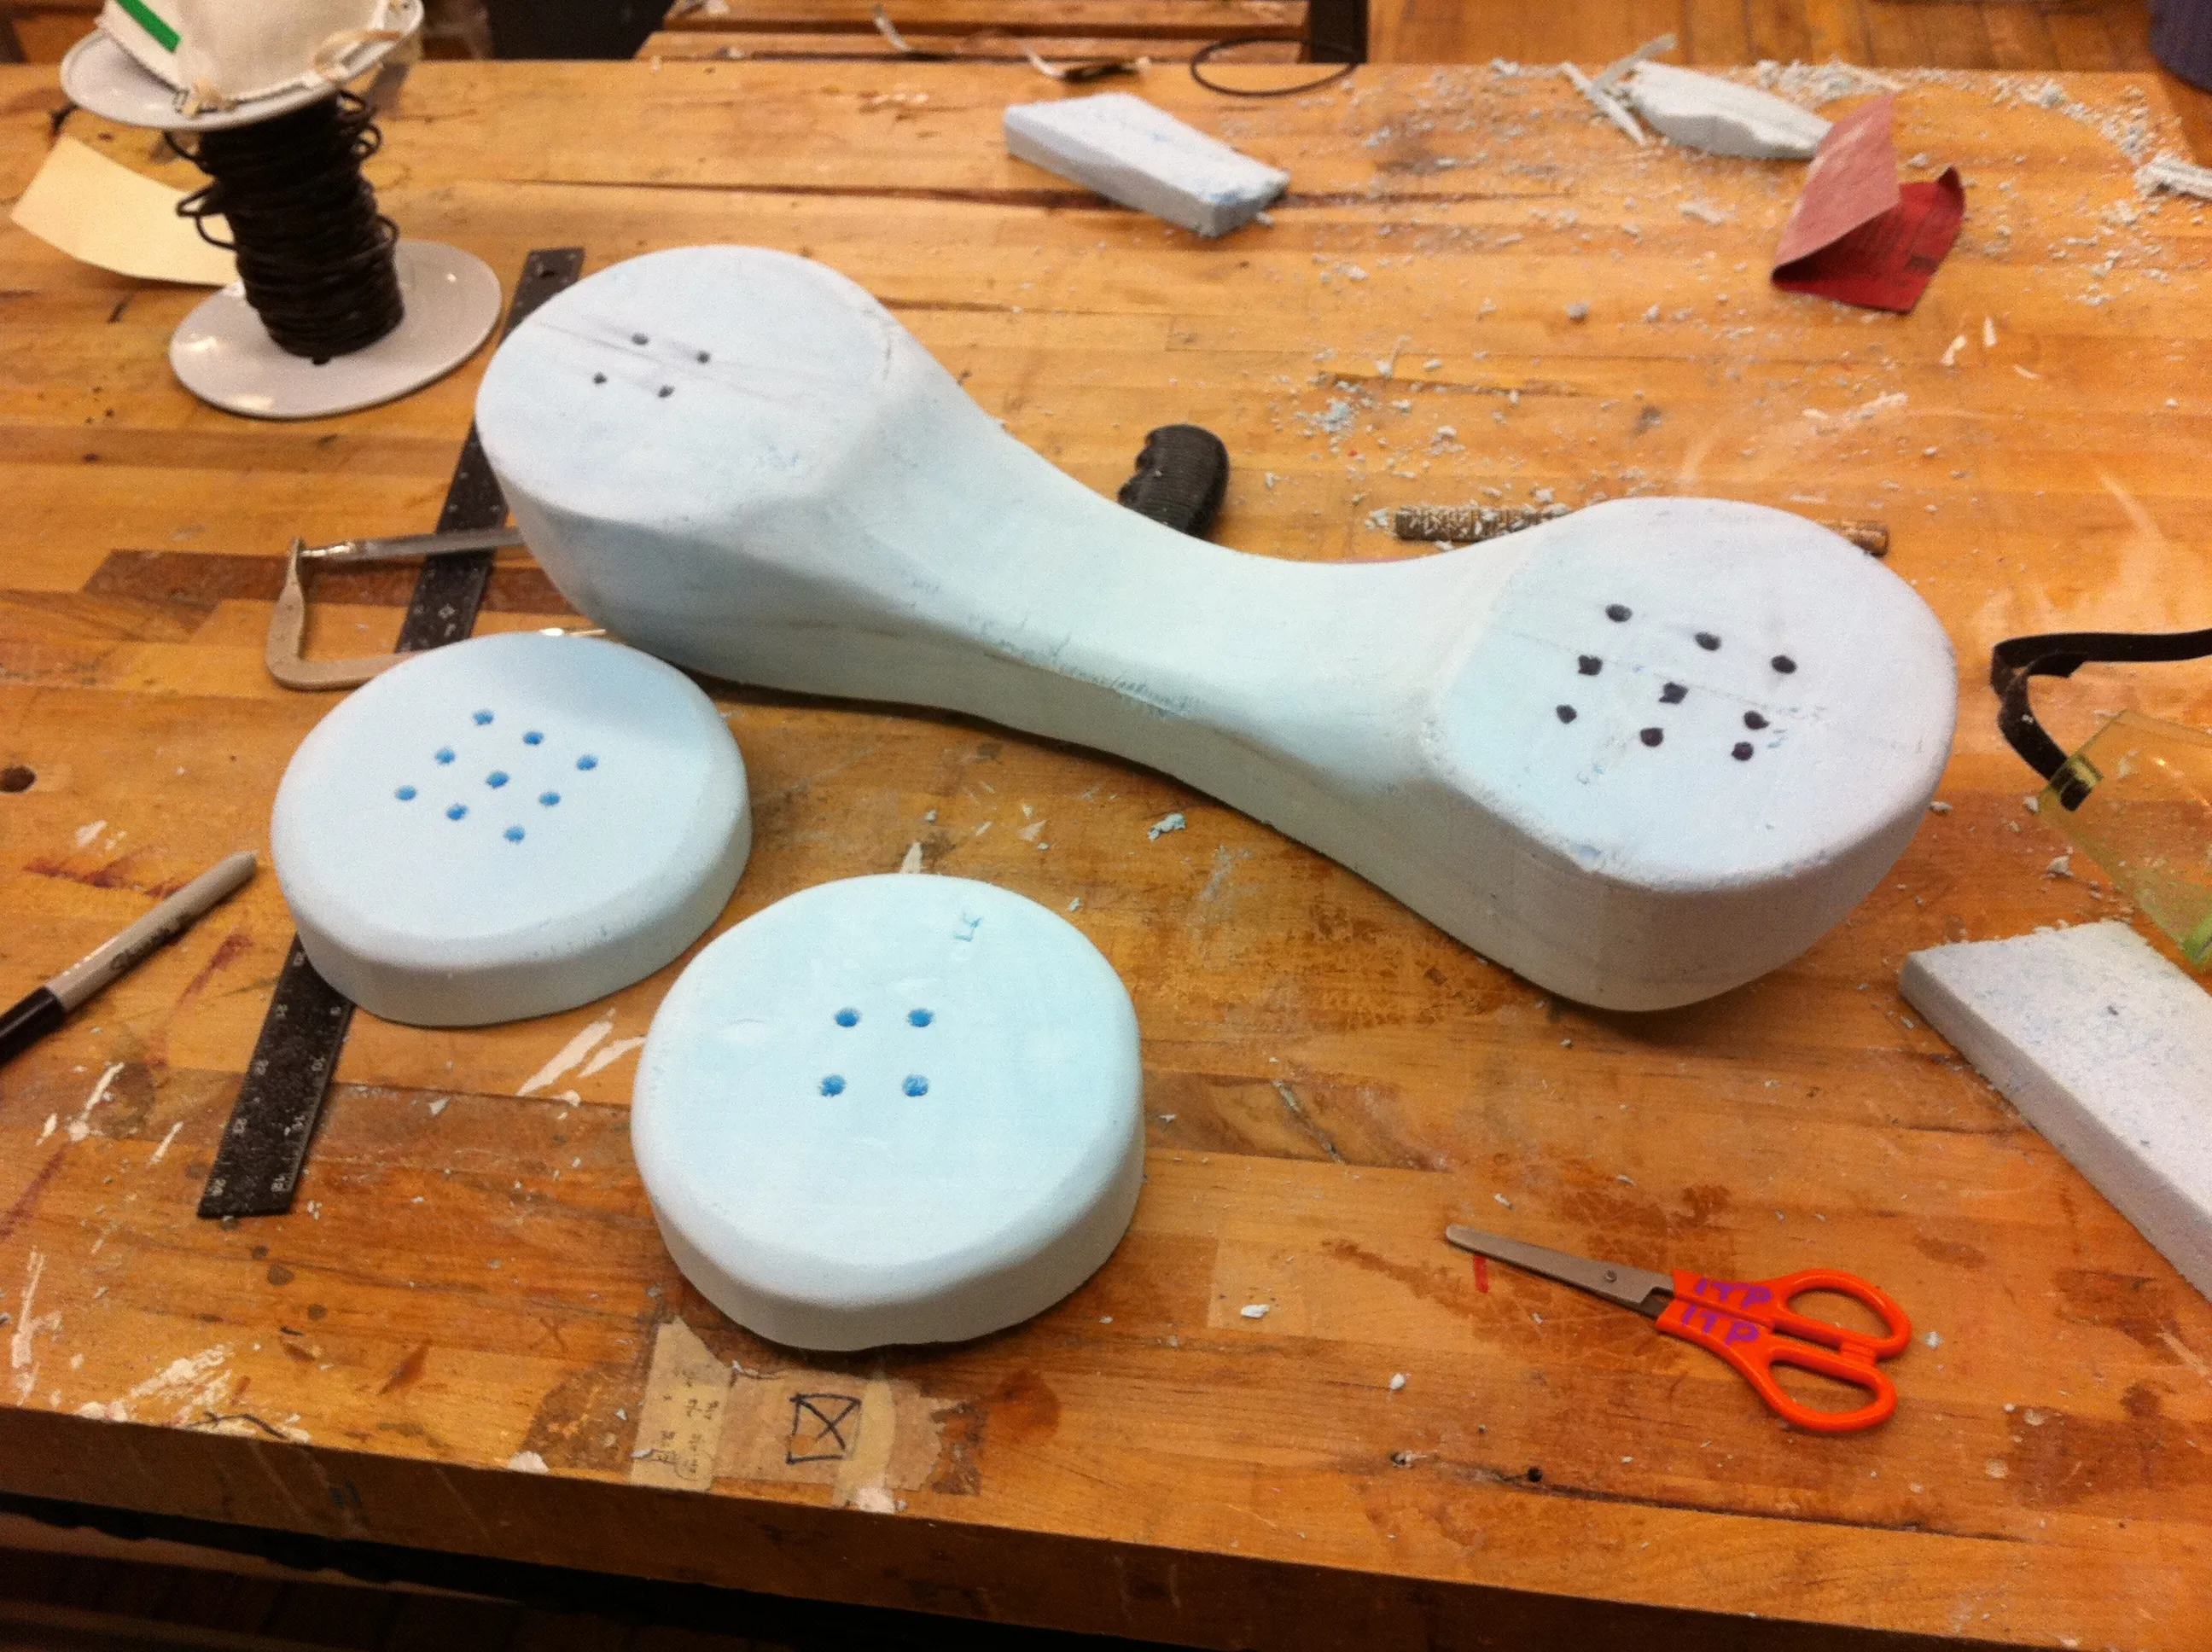
I used another round of transfer tape to attach the disks to the handset. About 20 minutes of sanding and finishing work leaves the finished phone:
I learned a few things about the material that will guide any future use:
-
Higher speed tools do cleaner, more consistent work — the belt sander and band saw avoid tearing / chunking the foam the way hand tools do.
-
Extra-wide transfer tape is worth the up-front expense for larger projects.
-
The foam seems to have a grain. Sanding in certain directions minimizes chunking. I haven’t figured out how to identify the grain.
-
Relief cuts make shorter work of tight curves.